Reflecta Filmscanner RPS 10M test report
During the 2014 photokina, reflecta introduced a predecessor for the tried and trusted reflecta RPS 7200 Professional. Since the beginning of October 2014, the Refleca RPS 10M is available on the market.
It's apparent at first glance that from the outside, only the coloring of the case has been changed. The Reflecta RPS 10M received an elegant two-tone-look. The main alteration to the preceeding model lies in the interior life of the scanner: Thanks to a new CCD-sensor, the nominal resultion was increased from 7200ppi to 10000ppi.
For those questioning the "M"-part in the Name of the Scanner, let there be no doubt that this does not stem from the term "mega" - which would seem to be natural, speaking in terms of digital photography. Instead, it derives from the "m" in the latin word "mille" - which stands for thousand. If it were not for our good old latin dictionary! Whether theses astronomical 10.000 are actually fact or, as we have often encountered, a mere mains of marketing, will be revealed in the chapter image quality.
The Reflecta RPS 10M has been replaced by its successor Reflecta RPS 10S in March 2025.
Features, accessories and performance evalution
The Reflecta RPS 10M features both a single slide slot for scanning one slide at a time, as well as a means to automatically load and batch scan 35mm film strips and 35mm roll films. This said, it's one of the few film scanners offering the possibility of digitizing entire film rolls. The mechanics are the same as in the predecessor model: film strips are inserted sideways and then drawn in automatically. In addition, the film can then be moved manually via the hard keys on the scanner case. Film strips should contain at least three images, otherwise they might get caught in the process. The upper limit of images for batch scanning amounts to 36 images - perfectly adequate for standard 35mm films. Since framed slides are inserted directly into the slot at the front of device, there is no need for film holders.
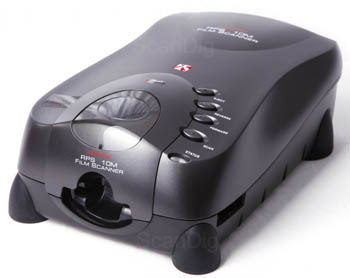
The Reflecta RPS 10M boasts a nominal resolution of 10.000 ppi. We can assuredly predict the actual value to amount to 50% of this number. The precise value shall be determined in our resolution test. There are no surprises to be expected in terms of density range, neither, as the producer states the value to be Dmax=4.2. Just like it's forerunner, the RPS 7200, the 10M is equipped with a USB 2.0 port. The matching cable is included in the box. It is reasonable to ask why the Scanner was not fittet with a USB 3.0 port instead. Considering the fact that the data transfer takes up only a tiny fraction of the scanning time, the USB 2.0 port remains a valuable option to make do with.
The term ICE technology, which was the denomination for the infrared-based dust- and scratch removal with the RPS 7200, has been replaced by the term MagicTouch with the RPS 10M. This change is observable during all model changes of reflecta and is attributable to a name change in license regulations. The RPS 10M is the only device amongst all reflecta scanners to flaunt the company logo, situated on top of the device, in the very center of the case.
One of the most prime attributes of the reflecta RPS 10M ist the Auto-Fokus, distincly setting it apart from other Scanners in the same price range. Most other film scanners offer only a fixed focus, dictating the focal plane. Even a slight arch of a slide can result in fuzziness in the center of the scan. The auto-focus of the RPS however precisely determines the focal plane for each individual scan. Furthermore, the focal plane can be set manually via the scansoftware SilverFast. Currently, only a handful of scanners possess this feature, such as the professional models from Nikon or the Epson Expression 12000XL, all of which range in an entirely different price range.
The standard software supplied by the manufacturer is CyberViewX. Our test model was delivered with the Version 5.16.20. SilverFast is available optionally, coming in a variety of versions. We will elaborate further on the difference in quality between the two scanning software versions in the chapter image quality.
Installation and start-up
With overall dimensions amounting to 274 x 183 x 97mm, the scanner is delivered in well-padded cardboard box of 41x36x20 centimeters. Given that the reflecta RPS 10M itself is a rather space-saving device with no need for film holders and negative carriers, there is not much room needed on the desktop. The software should be installed prior to connecting the scanner to the computer. Doubling as scan-software scanner driver in one, the installation of the SilverFast-software renders any need for CyberView X unnecessary. Any optional image editing software can be installed independantly and is uncomitted to scanning activities.
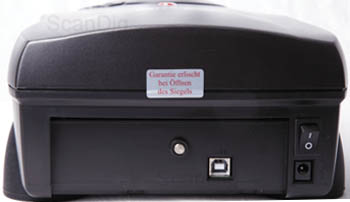
For both CyberView and SilverFast offering regular updates to the user, it's recommendable to ensure that the running version of the software is up-to-date. Software updates take place free of charge through the respective producers' homepages. Once the software has been successfully installed and checked for updates, the scanner is to be connected to the power grid up using the mains cable and connected to the PC via the USB cable - both part of the delivery scope. Its advisable to eschew the use of any USB-hubs or - extensions, as this often leads to complications. What's more, no cable longer than the one supplied with the device should be used, as this too might lead to communication issues between the scanner and the PC.
The scanner is powered up through a small flip switch on the rear end of the device. Now the scanner starts rattling and the scanning unit inside moves back and forth a couple of times. As soon as the scanner is operable, the green LED goes from discontinuous to continuous mode.
Next, the scansoftware is launched. In the case of SilverFast, the user is prompted to enter a serial number. The latter can usually be found in the lower section of the booklet inside the SilverFast software-box. Once this is done, the software opens up and the scanning can begin.
Scanning film strips with the Reflecta RPS 10M
The concept of automatic drawing-in and batch scanning film strips suggests the main purpose to be the scanning of film strips. Film strips of 3 to 36 imgaes can be batch-handled. This saves the user the user manual positioning of film holders, as well as the advance of the latter by hand. Once the scan process for several pictures has been started, there's no need to sit and wait - instead, this time can be spent more purposeful. The film is being inserted into the designated slit to the side of the scanner, automatically drawn in and transported further by means of the perforation.
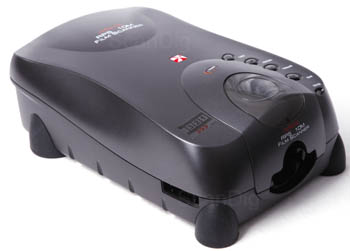
For inserting film strips, we highly recommend the use of cotton gloves, as this will garantee the safe handling of precious material, preventing dirtying or damaging. As the transport mechanism of the scanner relies on the perforation, it is vital for this to be fully intact. In case of a partial damage of the perforation, it's commendable to cut the Film up into single frames which can then be framed and digitized individually. Those dealing with entire film rolls of 36 frames in mint condition should consider themselves fortunate as they will benefit of the true virtue of the RPS 10M. We will elaborate further on this within the next chapter.

Once the film strip is inside the device, the index scan can be started in the software. This helps to keep track of the images contained on the Film strip. As our spreadsheet reveals, this is accomplished quickly in SilverFast, whilst CyberView performs rather sluggish due to the fact that it performs a full preview scan of each frame. Since it will always be automatically invertted in the case of negatives, this preview is then present in the form of a positive, making it to take one's pick. Prescans of single images can subsequently be made in SilverFast - or invoked by clicking on the miniatures in CyberView. Alternatively, the final scan can be started right off. What matters here is whether there are adjustments to be made beforehand. Scanning the image into RAW-format through SilverFast (HDRi), renders this unnecessary. We will take a closer look on available options in the respective Software within the chapters image quality in conjunction with CyberView and image quality in conjunction with SilverFast.
The film strip is inserted horizontally into the scanner and treads out just the same. This is a key advantage, especially if a film strip is slightly waved, as the film strip does not have to be deflected but only transported horizontally. When dealing with waved negative strips, the negative transport poses to be beneficial too, as the insertion and draw-in into the left slit proves to work very well.
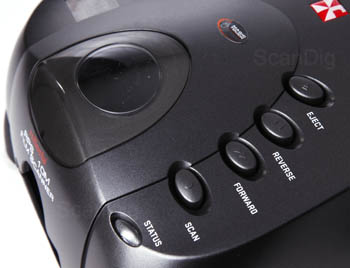
On top of the scanner, there's a small window through which the currently positioned film can be seen. Nontheless, due to the dim lighting, it's necessary to do a previewscan or indexscan. The quick scan button atop the scanner can be used only in conjunction with CyberView - it's inoperable in SilverFast. The buttons for film transport do work autonomous from the software. In case a film strip has been mal-positioned, these buttons can be used to forward and rewind it, the function being much like that of a VHS recorder. The film is being moved in tiny increments which allows very precise readjustments. Upon prolonged pressing of one the abovementioned keys, the film will advance or rewind for an entire frame. The eject key will - naturally - eject the film.
Users wanting to clean their negative stips beforehand so as to achieve better scanning results, can do this for example using an anti static brush. This does not only reduce potential artifacts that have been missed by the automatic dust- and scratch removal, but also treats the scanner with care. Even then smallest dust particles inside the scanner can cause problems over time. If too much dust accumulates in a certain place, this can lead to banding in resulting scan files.
If dust has gathered on the sensor, the scanner may be cleaned using a compressed air spray.
One of the easiest ways of cleaning film strips before retraction into the scanner is the use of a Kinetronics anti static film cleaner MiniStat MS-035.
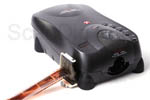
Upon clicking the alongside picture, an animation with three images will open, illustrating the use of a Kinetronics MiniStat MS-35. The MiniStat film-cleaner can simply be placed next to - or attached to the left side of the scanner. The magnetic base of the MiniStat ensures a flexible, yet stable mount on the working desk. A hinged metal plate is supplied with the product. A common flat washer from the hardware store or an adhesive strip will work just as well.
The film is thread throgh the fine fibers consisting of electrically conducting synthetic. This way, dust is being removed and the material is discharged from electrical charge. As discharged film strip will naturally attract less dust particles, the cleanliness will last longer. Since the entire film strip passes through the MiniStat before entering the scanner, every frame will be cleaned from dust. Caution is required if the Film is being rewound, eg. after an index scan, as this can lead to jamming in case the film does not find the way through the brush.
Scanning film rolls with the Reflecta RPS 10M
Besides the Reflecta RPS 10M only the Nikon Super Coolscan 5000 ED, in conjunction with the optional Adapter SA-30, can process entire film rolls at once. All other film scanners are limited to six images.
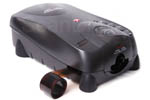
The Reflecta RPS 10M can automatically draw in and batch scan an entire film roll. It's important though that there's sufficient room on the desk left and right to the scanner (since the film roll is being ejected in the same way as it's inserted). Thus, a major part of the unrolled film will always stay on one side of the device, it's placement shouldbe carefully chosen and the process should be monitored with equal care.
Although experience shows, entire film rolls are usually strongly domed, the RPS 10M handles them very well. The insertion of the film into the scanner is just marginally more complex than with smooth film strips and once the scanner has registered the entire roll, we're ready to roll, so to say. The scanning process does not differ from scanning of seperate film strips. The index scan works just the same, as does the pre scan.
As of now, the Reflecta RPS 10M is the only film scanner to draw in and batch scan entire film rolls of up to 36 images.
For the sake of completeness it should be noted that the Nikon Super CoolScan 5000, in conjunction with the optionally available film roll adapter SA-30, as the only alternative, can also handle entire film rolls. In terms of price and quality, this combination ranges in a completely different league.
Scanning 35mm framed slides with the Reflecta RPS 10M
Scanning of framed 35mm slides is utterly simple, as there is no need for dealing with frame holders and frame thickness. With an acceptable maximum frame thickness of 3,5mm, all common 35mm frames are covered. A recessed slot can be found at the front of the scanner. When there is no slide injected, this slot self-closes. It's also self-adjusting to the thickness of the frame, thus nothing has to be regulated manually.
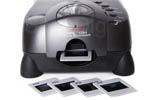
Owing to the scan area, the slide has to be inserted in landscape format. Portrait formats can subsequently be turned within the scan software. In case a slide is inadvertently injected in portrait format, it will be clipped on the top and bottom. Also, a black edge will be visible to the left and right side of the image. The quick and simple process of inserting a slide into the RPS 10M can be seen in animation upon clicking on the adjoining small picture.
With only one slide is being inserted at once, the necessitiy of index scans is eliminated. Besides that, scanning of framed slides passes off fairly similar to the scanning of film strips. If necessary, a prescan is run, after which software parameters are adjusted, followed by the main scan. The available software parameters depend on the scanning software at hand. Whilst CyberView X is a bit limited in this regard, SilverFast offers a wide range of options. We will delve deeply into the destinction between SilverFast and CyberView X, as well as the qualitative advantages of SilverFast in terms of scan quality, in the chaperts scan software and image quality.
Scanning single negatives and positives with the RPS 10M
As you saw, scanning of single framed slides and film strips with three pictures or more is plain vanilla. Scanning single negatives or strips of two images is somewhat more tricky. Trying to do it using the automatic draw-in involves the danger of jamming and potentially ruining film strips.
Such short film strips, as well as single images, should rather be framed beforehand scanning. Best suited for this purpose are the Wess AHX500K frames, as they allow for the full frame to be seen and scanned, hence there won't be any clipping issues as can be the case with most other types of slide frames. The hinges of the Wess AHX500K are very durable, as is the snap-lock, guaranteeing a long lasting and uncompromising functionality, even if it is frequently opened and closed. Two rows with 8 cams each keep the film plane and steady. If the Wess AHX500K are a tad too much for your budget, try the Reflecta CS slide mounts instead. They will also do the trick but wear out faster if opened and closed frequently.
Scanning other film format with the Reflecta RPS 10M
Scanning other film formats such as Instamatic, APS, Pocket or medium format is not possible with the RPS 10M. The device is built to handle 35mm small format film only with the scan-area measuring 24.3 x 36.5 mm and the film transport relying on the specific perforation of this film.
Film formats smaller than the 35mm small film format can be digitized only if mounted in 35mm frames, which is a lot of hassle. Our scan service would surely be much more convenient for those special formats.
Scan-Software of the Reflecta RPS 10M
The scope of supply includes CyberViewX (Version 5.16.50 for Windows in our case). Optionally, the scanner can be purchased with one of the five versions of SilverFast - SE, SE Plus, SE Archive Suite, Ai Studio and Archive Suite. We enlarge upon key differences between the SilverFast versions in our chapter Questions about the scan software SilverFast. Adobe® Photoshop® Elements is available in different versions, too. To find out, which one of the these is best suited for your needs, please check out our Adobe® Photoshop® Elements comparison of versions. Do note though, that Photoshop® Elements is not mandatory, as the scan software already offers means of tweaking the pictures beforehand scanning.
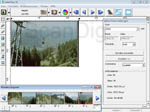
The scanning software CyberView X, which is always included in the box, is produced by the manufacturer of the scanner. Evidently, it offers only limited means of manually optimizing the pictures. The only tools for manual adpation are the so-called variations, the color balance, the curve and levels. With the variation function, color and brightness can be controled through small preview pictures. The color balance consists of three color controllers, (CMY/RGB), and then one each for bightness, contrast, and saturation. Through the curves- and levels-tool, both gradation and tonal values are controlled. Unfortunately, not all tools allow precise adjustment. What's more, tools like selective color correction are not even available.
CyberView does indeed offer only little manual control. Instead, there are lot's of automatic functions at disposal. Next to auto exposure, auto balance, auto contrast and auto color, there's even auto cut. A good deal of functions which all work more or less. As with all automatic correction features, one should never rely on them to actually improve the pictures. The reddish evening light, for exapmle, can never be interpreted as such by an auto-correcting function. Neither can be the yellow warmth of candlelight on a christmas tree, which is why such features should be treated with caution.
The Reflecta RPS 10M is being shipped with the rather simple scan software CyberView X. Quick and easy to master, this software comes in handy for beginners, but lacks technical possibilities of image optimisation for the advanced user.

If you purchase the RPS 10M bundled with the professional SilverFast scan software, you will receive the best scanning software presently availble on the market. Not only does SilverFast Ai Studio greatly impress with a huge functional range for optimizing the scans - as can be seen in the alongside animation. Also the image processing algorithms do a much better job than those of CyberView X. We elaborte further on the differences between the two software in the chapter image quality with SilverFast, clearly revealing them by means of example pictures.
Key differences between SilverFast and Cyberview can also be found in the operation of the software. One such example are index scans: It takes ages to do them in CyberView because the software will run pre scans in addition to the requested index scan. Check out our table scanning speed for further details. Once the index scan has been accomplished, the user can switch back and forth between individual frames. If a new pre scan of one of those frames is needed, for example to assess the effect of an auto corrective function, this pre scan has to be run all over again for all pictures contained on the respective film strip. In SilverFast, to the contrary, this can be achieved by scanning only the one particular picture in need - which in most cases, won't even be necessary to do, as all functions for optimizing the pictures work in real time.

In CyberView, it's quite tricky to get to the point of selecting a storage location at first, because it's rather complex and counter-intuitive. In order to get there, one has to navigate to the presets for scan formats (depending; positive-negative-black and white), which is located in the menu "scan". File format, auto correction and magic touch functions can be found here, too. You can check out this menu in the accompanying screenshot.
Image quality of the Reflecta RPS 10M
The key difference between the Reflecta RPS 10M and it's predecessor RPS 7200 Professional is the maximum nominal resolution - which, accoring to the manufacturer has increased from 7200 ppi to 10.000 ppi. Therefore, let's start evaluating the image quality of the RPS 10M by doing a resolution test. We shall commence at a resolution of 5000ppi. At this resolution, a 35mm frame will be mathematically equal to 7087 x 4724 pixels, i.e. 33.5 megapixels. If saved in the uncompressed TIF-format, such a scan will have a file size of about 100 megabytes. However, it's up to us to find out whether the RPS 10M does indeed offer a resolution of 5000dpi. So let's do a resolution test using the USAF-1951 test chart (for more information regarding the matter, see our website resolution):
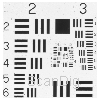

In the scan of the USAF test chart (image to the left) the horizontal lines of the element 6.3 and the vertical lines of the element 6.4 are still distinguishable. According to our resolution chart, this means an effective resolution of approximately 4300 dpi. Comparing to the appointed 5000 ppi, the Reflecta RPS 10M reaches 86% of it's nominal resolution. The predecessor RPS 7200 yields a mere 3800 ppi (of the appointed 7200), which equals only 53% of the nominal resolution. This means a significant increase in effective resolution as well as a significant percental increase towards the predecessor model. Due to the high efficiency of 86% of the nominal resolution, the image files are not as bloated as they used to be with the RPS 7200.
Looking at the resolution picture on the right side, which has been scanned at a resolution of 10.000 ppi, we can only just see detail in the elements 6.3 respectively 6.4. Thus, the effective resolution of 4300 ppi is not changed when scanning with 10.000 ppi. This gives proof of the fact that the 10 Mille is sheer marketing - it has absolutely nothing to do with engineering. So, what is the reflecta RPS 10M really? It's a 5000ppi scanner, not a 10000ppi one. Hence it should have been named RPS 5, instead.
The reflecta RPS 10M boasts an effective resolution of 4300 ppi, thus reaching a solid 86% of its nominal 5000 ppi. Scanning at 10.000 ppi will not boost the effecitve resolution.
With an effective resolution of 4300 ppi, the Reflecta RPS 10M trumps the long-standing frontrunner Nikon Super Coolscan 5000ED, which yields "only" 3900 ppi. Whilst the Reflecta RPS 10M reaches its 4300 ppi only at 5000 ppi, the Nikon 5000 does reach its 3900 ppi at a nominal setting of 4000 ppi. The actual difference in quality between the two devices - in terms of resolution, that is - lies in the difference of the percentage basis. They reach 98 - versus 86% of the nominal resultion.
As well, the Reflecta RPS 10M trumps its smaller brother, the Reflecta ProScan 10T, which yields an effective resolution of 4100 ppi. When printing at an output resolution of 300 dpi, this becomes clear. A frame of 24x36 millimeters can be printed in very good quality at up to 34.4 x 51.6 centimeters when scanned with the RPS 10M. Compare that to the 32.8 x 49.2 centimeters you will get from a scan file of the same picture obtained with the Reflecta ProScan 10T.
The Reflecta RPS 10M will deliver scan files with a size of 24 megapixels. In terms of resolution, a 35mm film will barely offer more. With an efective resolution of 4300 ppi, the reflecta RPS 10M reaches top position of all common film scanners available on the market today.
Image quality of the Reflecta RPS 10M in conjunction with CyberView
We already elabored on the humble means of manual image optimization using CyberView in our chapter scan-software. Now the question arises - how good is the image quality of the reflecta RPS 10M coupled with CyberView, given those modest capabilities.
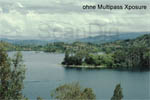
After having been introduced in the software of the reflecta ProScan 10T, the possibility of doing multiple scans now found its way into the software of the RPS 10M. It can be found in the submenu "extended adjustments" located inside the preset menu. Here, the user can choose between "Multipass Exposure" (a twofold sampling at different exposures) and the multiple sampling with 2- or 4-times sampling (same exposure). The two cannot be activated at the same time. Upon clicking the alongside picture, the display will change between a scan with Multipass Xposure and one without. Evidently, Multipass Xposure only leads to a darkening of the bright elements (eg. the clouds), resulting in a loss of overall contrast. Sadly, this function is not nearly as benefitial as the corresponding MultiExposure in SilverFast - which in its turn yields an increase in contrast. During our test, we could not see any difference when activating the multi sampling function.
A renowned feature and already standard for film scanners is the hardware-based, automatic dust- and scratch correction. In CyberView it't called MagicTouch. The detection of dust and scratchtes is effected by means of an infrared sensor. MagicTouch, just like all other, similar hardware-based dust-and scratch corrections, can only be used when processing films that do not contain any silver. Since most monochrome films do contain silver, the automatic correction has to be tunred off.

If you click on the alongside picture, the picture will switch switch between a scan run with MagicTouch and a scan run without the feature. For illustrational purposes, large affected particles are marked red in the graphic. Sadly, the dust- and scratch removal eliminated some essential parts of the picture that should not have been affected. For demonstration, we encircled the windows in the last scans of the animation. If you pay attention, you will see that MagicTouch causes the frames to look "unusual". In order to find out whether this is due to the software-algorythm or the infrared sensor of the scanner, we scanned the same slide using SilverFast. The following shows destinctly that the problem lies within the algorythm of MagicTouch as iSRD does not cause any such artefacts.

Upon clicking the adjoining picture, three different image sections of the previous slide will open one after another. The display will switch between the scan obtained using CyberView and the one obtained with SilverFast. It's obvious at first sight that SilverFast's iSRD operates much better than CyberView's MagicTouch. In the first section, the dormer window of the house front isn't quite round in the scan from CyberView. In the second frame, the window frame is distorted. The same goes for the billboard in the third frame.
The automatic dust- and scratch correction MagicTouch achieves half-decent results. The iSRD function from SilverFast however yields much better results.
Next, we will check out the color rendering. We have scanned the images both with and without additional settings. The auto color function, which can be found in the menu "scan" → "presets" on the same page with MagicTouch. If this function is checked, a new prescan has to be made in order to refresh the image display.


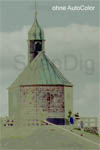
We scanned both two color negatives and one diapositive. The picture on the left shows a scan of the later. The pictures in the middle and to the right the scans of the negatives. Upon clicking on the miniatures, pop-ups will open, revealing the enlarged verisons which then swap back and forth between scans with and without color correction. The difference is distincly visible: whilst the scan from the slide is usable even without extra settings, the result enhance when turning on the auto color function. The scans of the two negatives seem to be rather poor without extra settings. The rightmost picture is even unusable. This is most startling as both negatives belong to the same film strip.
Image quality of the Reflecta RPS 10M coupled with the scanning software SilverFast
Instead of using he proprietary software CyberView, the Reflecta RPS 10M can as well be operated through the scanning software SilverFast. The latter is a professional scan software that has been on the market since decades, produced LasersoftImaging, which are based in Kiel. This software will yield better results, in particular because it has very sophisticated image processing algorithms at it's command that have been continuously improved over the decades.

With it's main advantage being the automatic scanning of film strips, the Negafix-dialogue in SilverFast is one of the most significant assets of scanning with the RPS 10M. In this dialogue, which is availble both to the SE variants as the Ai studio versions, certain presettings can be made. The brand and type of film can be chosen via a dropdown menu. Moreover, in the Ai Studio Version, the user can edit profiles and even create his or her own presets. The difference between a scan made with SilverFast and th esuitable type of film picked and one made with CyberView can be seen in the accompanying example picture. Neither manual nor automatic corrections have been made in the process of scanning. The only difference in the settings: The Fuji Superia 200 profile is activated within the SilverFast software. The comparison reveals a remarkable difference and requires no further comment.

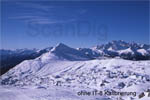
Not only does the use of SilverFast cause quality impovements while scanning negatives, it also increases the scanning quality of slides, as the next two examples clearly show. The image quality of the slides can be further increased through an IT-8 color calibration. The latter is available only in the Ai Studio Software. In addition to the software, an IT-8 Target is needed, as this is not part of the scope of the delivery. With help of this target, the scanner will then be calibrated film specific.
For each of the two examples, we have performed three scans. Upon clicking on the miniature view, an enlarged version will pop up in a new window, which will then swap between the scan performed with SilverFast without IT-8 calibration, the scan performed with SilverFast and IT-8 calibration and the scan performed using CyberView. The slide with the yellow car has been made using a Kodak film, and the scanner has been calibrated using a Kodak IT-8 Target. The image of the mountain peak was made using a Fuji slide film, hence the calibration for this scan was made using a Fuji IT-8 Target.
By means of comparison, the quality enhancement becomes obvious, clearly showing that the image quality is already enhanced when using SilverFast and further increased by the IT-8 calibration. It's certainly vital to calibrate using a Kodak IT-8 Target for scanning Kodak films and a Fuji IT-8 Target for scanning Fuji films.
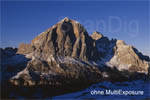
Besides the IT-8 calibration, SilverFast Ai Studio offers one more scan enhancing feature: MultiExposure. This tool is included not only in the Ai Studio Software, but also in the SE Plus edition of SilverFast. MultiExposure is a multiple sampling, combining two different exposures of the same image and thus enhancing the dynamic range of the scan. It's especially useful when dealing with negativs of high dynamic range, but lengthens the scan time. In our example picture we scanned the slide both with and without MultiExposure. Particularly the shadow areas on the mountain exhibit that the usage of MultiExposure leads to increased detail, whilst preserving the bright, snowy parts uncompromised. Thus, the use of MultiExposure may well increase the range of contrast.
Of the many functions for image optimization in SilverFast, MultiExposure is one of the most pleasant, as this function will always do good, never harm. Hence, it can confidently be activated at all times, leading to an increased image quality of film material with a high dynamic range. Images of less dynamic range will not be affected by MultiExposure.
The MultiExposure function in SilverFast SE Plus and SilverFast Ai Studio considerably increases the scan quality of film material with a high dynamic range. Film with little dynamic range won't be affected by MultiExposure. Conclusion: MultiExposure is a function that will do only good, and hence can safely stay activated at all times.
The only downside of MultiExposure is the increase in scanning times. If you're in a hurry, you might want to use this feature purposefully. If time is no issue to you, just leave it activated.

Next, we will take a look SilverFast's automatic dust- and scratch correction. We already showed that iSRD delivers much better results than the MagicTouch function of CyberView in the chapter image quality with CyberView. We therefore compare only between a scan with and one without iSRD in the adjoining example scan. For this purpose we use an image section taken from the previous sample image, the one we used in the IT-8 calibration-section. The sky in the mountain scenery is clearly full of dust and scratches in the scan without iSRD. The second scan, this time with iSRD, shows noticeably, the even the biggest particles have been detected by the infrared sensor and removed by the software - without any trace, or artefacts. The automatic dust- and scratch correction iSRD in SilverFast exists since many years and can by now be referred to as sophisticted.
Lastly, we will go into the possibiliy of generating RAW-Scans in SilverFast. For this matter, there's the Versions SE Archive Suite and Archive Suite. Both variants contain the SilverFast HDR Software in addition to the standard scan software. With all three Variants of te SilverFast Scansoftware, RAW files (which are called HRD in SilverFast) can be generated. In the case of color images, these RAW files will have either 48bit or 64bit, the latter's higher bit depth being due to the fact that they hold the additional infrared channel as well. Each channel has a bit depth of 16Bit - making for a total of 64Bit.
In order to read an process this RAW data, the SilverFast HDR Software is needed. No other image editing software will do. By means of scanning into HDR-files, image editing and scanning can be completely seperated. A scan in HDR-format will hold only the hardware based settings such as resolution, iSRD and MultiExposure. All software based settings follow only after the scanning process, in the HDR Software. Since the HDR Software is not bound to the scanner, the post production can be run from another PC.
Of all the scanners we ever tested, the increase in image quality due to the use of the scanning software SilverFast is most conspicuous in the case of the Reflecta RPS 10M.
Scanning speed of the Reflecta RPS 10M
The scanning times were determined using a PC with an Intel Core i3 processor and 8GB of random access memory to which the scanner was connected through an USB 2.0 Port. The following spredsheet displays the measurement results of scans with CyberView and SilverFast Ai Studio:
| Procedure |
duration without MagicTouch (CyberView) |
duration without iSRD (SilverFast) |
duration with MagicTouch (CyberView) |
duration with iSRD (SilverFast) |
| Pre-scan |
0:35 min |
0:30 min |
- |
- |
| index scan for 6 negatives |
4:54 min |
2:15 min |
- |
- |
| posiive scan at 2500 ppi resolution |
1:41 min |
1:01 min |
2:19 min |
2:01 min |
| positive scan at 5000 ppi resolution |
3:08 min |
2:26 min |
3:57 min |
3:37 min |
| positive scan at 10.000 ppi resolution |
3:22 min |
3:30 min |
4:22 min |
19:07 min |
| negative scan at 2500 ppi resoltution |
1:22 min |
1:02 min |
1:50 min |
2:05 min |
| negative scan at 5000 ppi resolution |
3:03 min |
2:10 min |
4:08 min |
3:51 min |
| negative scan at 10.000 ppi resolution |
3:30 min |
3:40 min |
4:33 min |
17:13 min |
First and foremost, the tabular values show that the preview for a single frame takes half a minute, which is reasonable. The five minutes one has have to wait for an index scan of a film stip containing six images to complete in CyberView is plain and simple inacceptable. As this is eventually inevitable time loss you'll have to sit out before you can select single pictures and tweak the settings. The two minutes of waiting time in SilverFast are clearly more pleasant. Compared to the 15 seconds it takes a ten year old Nikon film scanner, both values should be considered excessively long.
The scanning times for negatives or positives in the nominal resolution of 5000 ppi are in the magnitude of 3-4 minutes. These times make the Reflecta RPS 10M a midrange film scanner. It's smaller Brother reflecta ProScan 10T is a lot faster. Interestingly, the RPS 10M' scanning times are consistently lower when operated through SilverFast than when operated with CyberView.
Comparing the scanning times of scans with 5000 ppi and 10000 ppi, hardly any differences are to be found. This underlines the verdict of our chapter image quality, namely that the RPS 10M is a 5000 ppi - but not a 10000 ppi scanner. The 10000 ppi is a mere interpolation value. Only when comparing the scanning times of 5000 and 10000 ppi scans with automatic dust- and scratch correction turned on, do the values differentiate. This isn't due to the scanner; it's caused by the data processing, which takes place solely inside the scan software on the computer.
The main task and key advantage of the Reflecta RPS 10m is the automatic scanning of several frames on one film strip for which, first of all, an index scan hast to be run. This takes two minutes in SilverFast, which is only just acceptable. Thereafter, a strip of six frames will be batch scanner frame by frame. This procedure takes 20 to 25 minutes, depending on the settings. During this time, the scanner can be left alone, and the computer is freely available for other tasks such as image editing or image annotation.
Users looking to digitize an entire film strip, will not care too much whether this procedure will take 10 or 20 minutes. The scanning time of approx. four minutes per framed slide however, is hardly bearable. A full day of scanning will work off just about one magazine of 100 slides. For scanning large amounts of framed slides, a magazine scanner in the likes of the Reflecta DigitDia 6000 will do significantly better - but also at a high cost price.
Warranty
Reflecta limits the warranty for the RMS 10M to a number of 10000 scan processes. A scan process can be an index scan, a prescan or a main scan. If you choose the option multi-exposure within the scan-software, the film will be scanned twice and the scan counter increases by 2. The same holds for multi times scans. In autumn 2018 this warranty restriction was abandonned by reflecta.
Conclusion, summary
Our test report has revealed that the Reflecta RPS 10M is not a 10000 ppi scanner, but in fact a 5000 ppi scanner. Scanning slides or negatives at 5000 ppi will yield an effective resolution of 4300 ppi. This very high effective value places the Reflecta RPS 10M at the top of all film scanners currently available on the market. Only the Hasselblad scanners yield a higher effective resolution.
The Reflecta RPS 10M is mid-range in terms of scanning speed. Its main advantage is the automatic scanning of entire film strips and film rolls with a length of up to 36 frames. It's unique on the market as it's the only film scanner to automatically draw-in and transport film strips as standard. Digitizing framed slides proves to be a simple, however yet time-consuming matter.
Moreover, our test report has shown that the image quality of the Reflecta RPS 10M is largely dependant on the scanning software. Never before have we experienced such remarkable progression in image quality due to SilverFast.
The Reflecta RPS 10M is currently the frontrunner in the middle price segment. With its automatic film strip draw-in and its adaptable focus and autofocus, it possess unique features that can otherwise be found only with Nikon film scanners.
Back to the film scanner tests index
|