Questions concerning the Filmscanner Reflecta RPS 7200, 10M
How does the RPS 7200 differ from the RPS 10M?
Externally the two RPS models 10M and 7200 hardly differ. The significant case with the 4 wide feet and the viewing windows at the front side is identical. Only the colours differ a bit. The RPS 10M has an elegant black colour whilst the predecessor has a combination of blue and silver.
In our filmscanner shop, the Reflecta RPS 10M is available in our stock in many variants. The RPS 10M has got an increase in the nominal resolution compared to the predecessor: The resolution has increased from 7200 ppi to incredible 10.000 ppi. In reality this sensational value is not neccessary, since no 35mm slide or negative contains so many pixels as a scan yields with that resolution. In practice a resolution test with an USAF test target shows that the effective value is not even near the nominal value of 10.000 ppi (see our review in the chapter image quality).
The effective resolution lies at a value of only approx. 4300 ppi, however, is still higher than the value of 3900 ppi at the RPS 7200. All in all one can summarize that the RPS 10M yields a better image quality as the RPS 7200 thanks to its higher resolution.
Which advantages does the RPS 10M have compared to the CrystalScan 7200 or the ProScan 10T?
One important advantage of the RPS 10M compared to the CrystalScan 7200 or the ProScan 10T is the automatic film strip feeder. Concerning the exact positioning and sliding of an image during the scanning of film strips, the CrystalScan 7200 purely depends on manual work, and so does the ProScan 10T. Contrary to that, the handling of the RPS 10M is much more comfortable during the scanning of film strips. By introducing the film strips into the slit located at the front part of the left side of the RPS 10M, it will be automatically pulled inside.
The position of the image can be controlled through the view window that is a further helpful plus factor compared to the CystalScan 7200. With the additional keys "Reverse" and "Forward" at the upper side of the RPS 10M, the film strips can be moved back and forward for the vernier adjustment. Also the move of full images is possible over these keys (in this concern, read our test report RPS 10M). By adding the job-manager of SilverFast, with the automatic feeding of the film strips, also the scanning of complete film strips and film rolls is easily possible in one step.
The RPS 10M has, compared to the CrystalScan 7200, a higher maximum density. It is 4,2. The CrystalScan has only a value of 3,2. Therewith, it is also possible to conclude a higher range of density of about 3 of the RPS 10M. This means that the RPS 10M has a bigger range between the maximum and minimum density in which it can fully capture all colour shades of an image. This is specially noticeable in the bright lights and the dark shade areas (on our page about the Density you will find more detailed information in this regard).
Which advantages does the autofocus/manual focus of the Reflecta RPS have?
The Reflecta RPS has a decisive advantage over all its competitors in the same or lower price field: It has an adjustable focus area. Other film scanners usually have a fixe focus, i.e. a firmly set focus level. How can you imagine that? Let us take a normal flatbed scanner, where a mounted slide is put on the glass surface. The distance of the CCD line sensor to the glass surface may be 1cm, the thickness of the glass surface 2mm. A typical slide mount has the thickness of 2mm, in the middle of it is the film. So the focus of the scanner is set to 1,3cm by default. Since this setting is fixed, it is also designated as fix focus.
So the scanner in the above example always scans sharply what lies exactly 1,3cm above the CCD sensor. If you put a very thick 35mm slide (e.g. 3mm thick) on the glass surface of the scanner, the film has a distance of 1,5mm to the glass surface. The focus now should be set to 1,35cm, however it stays at the given 1,3cm. Because of that the achieved sharpness of the scanner suffers. Of course, the same holds if you put a film strip directly on the glass surface. Then the focus should be set to 1,2cm, however, it stays also at the given 1,3cm.
The Reflecta RPS has an auto focus or a manually adjustable focus, respectively, as one of the few scanners on the market. So the focus length does not have a fixed set value at the reflecta RPS like in the above example of 1,3cm, but it will be computed individually for each film. Of course this takes a couple of seconds, however, therefore the scanner always delivers scans with an optimal sharpness. With the manually adjustable focus function the user can even determine, how the focus is set. This is useful, for example, if a strongly curved film has to be scanned. In such a case you can determine manually which area of the film shall be sharp by setting the focus point correspondingly.
With that auto focus / manual focus function the reflecta RPS is indeed an exception in the scanner price field under 2000 €. Other scanners with autofocus function cost a multiple of it. The following scanners also have an adjustable focus: Epson Expression 12000XL, Hasselblad Flextight X1, Hasselblad Flextight X5, Nikon Super Coolscan 5000ED, Nikon Super Coolscan 9000ED.
In what does the RPS 7200 differ from the RPS 3600?
From the exterior, the two RPS models 3600 and 7200 barely differ. The outstanding distinctive case with the four wide bolts and the viewing window at the front are identical. Also the colour is the same.
Compared to the former model, the RPS 7200 provides a further inprovement in the nominal resolution. It even doubled from 3600 dpi to 7200 dpi. From a realistic point of view, this sensational value of a resolution overshoots the mark, as there is no small picture slide of small picture negative that contains so many pixels as a scan with such configurations does provide. In practice, it is demonstrated in a resolution test with the help of an USAF-test chart that the effective value does not even approximate this nominal value of 7200 dpi (see the test report under Image Quality). The effective determined rersolution is certainly only of 3900 dpi, but is still higher than the value of 3300 dpi in case of the Crystalscan 7200. In summary, one can say that the RPS 7200 provides a clearly better image quality as the Crystalscan 7200 due to its higher effective resolution.
Compared to the RPS 3600, the RPS 7200 outstands by the imprint ICE3 technology at the upper side of the view window. A further hint to a clear difference in the interior. It is a sophisticated procedure for the detection and correction of scratches and dust (ICE) as also the two other correction procedures GEM for the film grain smoothing and ROC for the colour restauration. Contrary to the manual handling of dust and scratches with the software-supported SRD procedure of the RPS 3600, in case of the RPS 7200, the dust particles and scratches are detected at the film surface by means of a hardware-based infrared. During the scan of a film strip, this procedure can be activated by a mouse click so that every image is automatically corrected. This is a huge simplification of work and time saving.
Also, the connection possibilities offered at the back of the devices have changed. The SCSI-connection of the RPS 3600 has been changed for a firewire connection in the RPS 7200. Meanwhile, this is also already obsolete, as the new devices of the RPS 7200 are only equipped with an USB connection.
Which advantages does the SilverFast Scan-Software offer?
By comparing the professional scan-software SilverFast of the producer LaserSoft Imaging with the scan-software of other producers, the scan-software of SilverFast outstands specially due to its sophisticated algorithms for the image processing. Most of the times, these algorithms take more out of the scanned raw data than the other standard-scan software. In case of filmscanners that innately have a range of density of 2,5 with the own software, SilverFast partly avhieves a value of more than 3. By this way, much more differences can be captured in the extremely bright lights and/or very dark shadow areas of the original image, a thing that leads to a higher image quality (in this concern, see also our know how-page about Density).
In our Filmscanner-Shop, SilverFast Ai Studio is also individually available for the Reflecta RPS 10M. SilverFast is equipped with numerous options of configuration and procedures for the image processing that are simply not avaiable in other scan programmes. From the simple brightless controls to sophisticated curve tools up to professional functions for saving the own special configurations for certain actions or for the creation of own profiles for certain types of films and/or types of recording, each considerable possibility is offered to to get the optimum of one's originals in an easy way.
A specially outstanding advantage is the IT-8 colour calibration of the scanner that is included in SilverFast Ai (in this concern see also our page Which advantage does the IT-8 colour calibration offer?). Possible deviations in the colour representation of the filmscanner based on the hardware are therewith effectively compensated. For the calibration, some high-quality IT-8-transparency-targets are included in the scope of delivery. They represent the reference data that are compared with the actual measured colour values during the colour calibration. The differences obtained are kept in an ICC-profile and reused for the automatic correction in the next scanning. With this calibration, specially in the case of slides a clearly positive improvement of the image quality is noticeable. The IT-8 calibration does not have such an important effect in the case of negatives. In order to optimize the negatives, SilverFast offers a special area of adjustment "NegaFix". Here, the producer and type of film can be exactly choosen. With this saved colour profile for negatives, one achieves clearly better results than with a standard colour profile.
A valuable help that saves a lot of work and time is the new auto-frame function. What is that? Normally, after the pre-scan, the area to be scanned is manually adjusted in a way that exactly the image is scanned without a black frame around it. The auto-frame function takes over this step with one mouse-click. After the pre-scan, the right area to be scanned is fully automatically recognized and adapted. The time consuming manual adjustment of the image can be skipped.
Finally, the high "compatibility" of the handling of the software of SilverFast is a great advantage. What does this mean? Once one has really learned deeply the user surface and handling of the scan-software of SilverFast, it is very easy to handle also the scan-software of SilverFast for another type of scanner. The reason for this is the uniform structure of the software for all supported scanner models. Thereby, one saves some valuable time of getting introduced into the matter after having bought a new device. Conclusion:
A high quality scanner as the reflecta RPS 10M should be used in any case with the scan software SilverFast Ai. THe additional price that is to be paid is already worthwhile the resulting increase of image quality.
Is the RPS 10M able to scan framed slides in the batch modus?
It is not possible to digitalize bigger amounts of framed small-sized slides in the batch modus at once with the RPS 10M, as it is always only possible to put one framed slide in the slit and csan it.
Thus, the RPS 10Ml is not a scanner whith which it is possible to scan large amounts of slide frames in a fast and easy way. For such an appliance, the Reflecta DigitDia 6000 or the Nikon Super Coolscan 5000 ED with slide feeder are the right devices.
Is the RPS 10M able to scan complete film strips at once?
The RPS 10M is specially apt for this purpose, as it is equipped with an automatic slide feeder. The film strip should not consist on more than 3 images, otherwise the thansport within the film strip slide can not be guaranteed. The shorter film strips consisting on only 2 images have to be cut and each of the images must be framed in order to scan them individually in the slide appliance.
If one wants not only to scan simgle images but several complete film strips, the best way is to make all the necessary configurations for a sample-negative strip and save them in a job of the job-manager of SilverFast. The following film strips are then scanned by repeating this job (see also in our test report of the RPS 10M: Scanning of Film Strips).
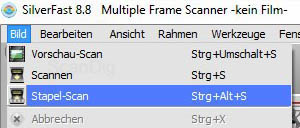
In SilverFast 8 it also works without its job manager. In order to start the batch scan, you choose batch scan in the image menu.
Scanning complete film strips not also works in CyberView and SilverFast Ai Studio but also in other SilverFast versions SE and SE Plus.
Is the RPS 10M able to scan complete film rolls at once?
The RPS 10M is able to feed inside a complete film rool and scan it at once in the batch modus. This is a big advantage compared with some other filmscanners of this category! There is no need of additional accessories for the digitalization of the film reels. The film reel is inserted into the same slit located at the left front side of the device where also the film strips are. The film reel will be automatically absorbed and after saving the configurations in a job of the job-manager of SilverFast, image by image will be scanned.
Is the RPS 10M able to process film rolls of any length?
With the scan software of SilverFast and its function of batch modus it is possible to accomplish an index-scan, pre-scans and the respective fine scans of all images of a film reels up to a length of 40 images.
A negative film strip with 7200 dpi and activated ICE (dust and scratches remover) can easily take several hours for digitalizing. In case of film reels there is to consider that they do not have any empty images at the ends, as they have to be cut off the film reel before scanning. The back- and forward buttons on the device serve for the exact positioning of the film. As outside the device, thus before and after the film slide, the film reel just lays around, one has to keep watching the scanning procedure in order to avoid the film roll gets tangled (see also Scanning Film Rools in our test report).
Is it possible to digitalise APS films with the RPS 10M?
People could think that with the RPS 10M or 7200 it is possible to digitalise complete film reels, as it is also possible to scan APS cartridges. Unfortunately, this conclusion is wrong. Compared to other filmscanners that optionally offer an APS adapter in the scope of delivery, not such a possibility of expansion. The RPS 10M or RPS 7200 is designed in such a way that it works without any frame and film adapter but also does not offer any possibility to scan APS films. Also trying to remove the APS film from the cartridge and insert it into the slit will fail, as the film format does not match into the slide for film strips of small format images.
APS-films can be only digitalized with the filmscanners for small format images of Nikon. Therefore, the optional APS-Adaptor is necessary. As the purchase of the expensive filmscanner of Nikon with an APS-adapter is not worthwhile just for scanning APS films, our scan service offers an alternative for APS films. We offer the Digitalisation of APS films for favorable prices and use therefore the filmscanners of Nikon.
Up to which frame thickness can the slide frames be processed?
With the RPS, all framed slides with any kind of frame up to a thickness of 3,2 mm can be scanned without any special film adapter. One simply has to push the framed slide into the horizontal orifice at the front part of the scanner. The adaptable slit channel narrows at the back and exactly adapts to the slide frame thickness up to the end of the drawer.
By a slight spring pressure, the slide is optimally fixed for the scanning. Up to the maximum frame thickness of 3,2 mm, all kinds of frames can be easily processed with the RPS 7200 or RPS 10M, from extremely thin plastic frames to cardboard frames up to extremely thick glass frames.
Why does the automatic image border offset not work correctly?
The automatic image border offset makes problems when the negative has too little drawing (i.e. it is under exposured) so that there is no clear border between the image and the bar.
By scanning some negatives, does one get positives?
With the reflecta RPS7200, RPS 10M or the previous model RPS 3600, it is possible to digitalize film strips and framed images. The film material should be neither positive nor negative. By looking at a negative strip with the naked eye, one hardly recognizes anything, as the image has been captured negatively and is additionally represented in a modified colour by an orange mask of the film. What kind of image results from scanning negative films?
By making a pre-view of a negative with the RPS, the image is immediately represented as a positive. Therefore, it is necessary to choose Negative in the configurations for the scanning. Then the scan-software inverts the image automatically and computes the orange-coloured masking out of the film. Thus, one sees a very normal colour image on screen. The same of course applies for the main scanning of a negative: one gets very normal positive images, as one is used to in case of digital images.
The scanning of negatives takes clearly longer than the scanning of positives. This is due to the additional work of the scanner and software for the inverting of the image as also the computing for removing the orange-coloured film mask.
Is it possible to digitalize Kodachromes with the RPS 10M?
In the slide scanner RPS 10M or RPS 7200 Professional of reflecta it is, of course, possible to insert and scan framed Kodachrome-slides. But the in-house CyberView-software does not release any acceptable results for Kodachromes. But there is a special configuration for Kodachromes in the SilverFast Ai scan software. But here, the image quality is not optimal, as there might be some distortions during the application of the automatic dust and scratches removal, see also our website about Kodachromes. You can improve the image quality significantly if you calibrate your RPS with a Kodachrome target.
Kodachrome-films are films of a very high quality with brilliant colours and a high sharpness, this is why most of the times, the demands of the Kodachrome-scannings are also very high. In fact, the only scanner that can digitalize Kodachromes in a very good quality is the Nikon Super Coolscan 9000 ED. If you do not have any huge amounts of Kodachrome films to digitalise, our Scan-Service offers an alternative for the scannings of Kodachrome. Therefore, we use the big Nikon Super Coolscan 9000 ED.
How does one activate the dust and scratches removal function in SilverFast 6?
The functions for the removal of dust and scratches differ depending on the version of SilverFast and the model of the scanner. In the following, the activation of the dust and scratches removal for SilverFast Ai Studio (version 6.5.0r5 Windows) for the reflecta RPS 7200 is described. The button for the activation of the dust- and scratches-correcting function is available in the vertical button stay at the left edge of the big pre-view window of SilverFast. The button has the labelling iSRD.

There are three possible modes of the button: inactivated (off), activated in the automatic mode and activated in the manual mode. The first picture (Picture 1) shows the button icon in the mode that the automatic dust and scratches corrector is off. One has to pay attention to the colour of the labelling of the button.

By a single click on this button, the automatic-mode of the dust and scratches corrector is activated. Picture 2 shows the respective status of this button after a click. There is to pay attention to the red i as a signal that the automatic mode is activated. In the automatic-mode, one does not have to do any further adjustments; SilverFast corrects the dust and scratches of each image automatically.

By pressing the iSRD-button a second time, one switches to the manual mode of the dust and scratches corrector. In the manual mode, underneath the iSRD-button, a further button appears with the labelling SRD for the input of special configurations concerning the dust and scratches corrector.
The detail-dialogue for the manual configurations is represented in image number 4. The details regarding this dialogue are described in detail in the textbook SilverFast - the official book.

By clicking the iSRD again, the dust and cratches corrector is deactivated.
How does one activate the automatic dust and scratch removal function in SilverFast 8?

In SilverFast 8 the automatic dust and scratch removal function has the name iSRD. The button for activate the function is on the left side beside the preview window. The function is activated if a red point can be seen below the iSRD logo. Depending on the SilverFast version a couple of seetings for the masks can be made in a small menu. Furthermore you can choose between different preview variants. If you scan in the RAW format HDRi the infrared channel for the dust and scratch removal function is automatically saved and has not to be activated explicitly.
How can the dust and scratch removal function be activated within CyberView?
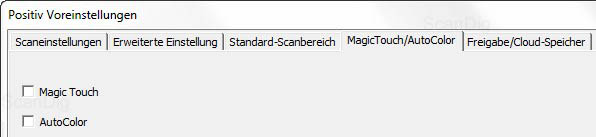
In CyberView the automatic dust and scratch removal function is called MagicTouch, and this function is somehow hidden within the software. In order to activate that function you choose the preseetings for positives and negatives separately. You may select the item MagicTouch/AutoColor and click in the field MagicTouch in order to activate that function.
Can the dust and scratch removal (ICE) also be applied in black/white images?
The ICE-procedure only works in the case of colour slides or colour negatives and cannot be applied to black/white images.
Important: By scanning some black/white originals, the ICE corrector must be deactivated. Otherwise the image quality gets so lost that the scans become completely useless, see in this concern our website about Questions about the correction procedure.
Can the highest effective resolution only be achieved with the maximum resolution of 7200 dpi at the RPS 7200?
This question could also be expressed by this way: is the adjustment of 3600 dpi sufficient in order to achieve the highest resolution in the scan? The background is as follows: according to the manufacturer, the RPS 7200 has a mega resolution of 7200 dpi. This means double as its previous model, the RPS 3600. But this superlative value - as already expected - is hardly achieved in reality. The actual effective resolution that is achievable with the RPS 7200 can be determined with the help of an USAF-1951-test charts. In our Test Report, we have measured for the RPS 7200 Professional an effective resolution of 3.800 dpi. In order to answer this question, we have made again some resolution tests with another device.
The have scanned the test chart with bar elements of different sizes, once with 7200 dpi and once with 3600 dpi. On the screen, the smallest distinguishable bar elements of both scans are analyzed. One bar element consists on three horizontal and three vertical bars, as the resolution can be different in horizontal and in vertical direction. According to a Resolution Table, each bar-element corresponds exactly to one resolution element. The following table describes the detected bar elements with their respective resolution elements with an adjusted resolution of 7200 dpi and 3600 dpi.
| Adjusted Resolution |
Bar-Element |
Resolution Bar-Element |
Effective Resolution |
| 7200 dpi |
6.1 |
3251 dpi |
3450 dpi |
| 6.2 |
3649 dpi |
| 3600 dpi |
5.5 |
2580 dpi |
2738 dpi |
| 5.6 |
2896 dpi |
Thus, with this test device we effectively only got 3450 dpi with an adjusted maximunm density of 7200 dpi. Thus, one could say that it is enough if the device is adjusted with only half of the nominal resolution of 3600 dpi in order to get the 3450 dpi. But our resolution test shows that then, one only gets 2738 dpi. Thus, in fact one has to scan with the highest resolution of 7200 dpi in order to get at least the maximum effective resolution.
Notification: the resolution of a scanner varies from model to modell in a certain margin. maximum effective resolution of 3800 dpi, with the second test device we only could detect ät nur 3450 dpi.
Can the highest effective resolution only be achieved with the maximum resolution of 10.000 dpi at the RPS 10M?
This question could also be expressed by this way: is the adjustment of 5000 dpi sufficient in order to achieve the highest resolution in the scan? The background is as follows: According to the manufacturer the RPS 10M has a mega resolution of 10.000 dpi. But this superlative value is only a marketing value, as one can suspect, and not a technical value. We can determine the resolution which can be achieved in practice by doing a resolution test with the help of an USAF 1951 test chart. In our Test report we have measured an effective resolution of approx. 4300 ppi for the RPS 10M. We can answer the original question by making a scan with 10.000 ppi and one with 5.000 ppi using an USAF test chart..
So we scan the USAF test chart once with 10.000 ppi and once with 5.000 ppi. Then we analyse the 2 scans on the screen. One bar element consists of 3 horizontal and 3 vertical singular bars, since the resolution can be different in horizontal and vertical direction. Each bar element corresponds a specific resolution value according to our Resolution chart. In the following chart we denote the resoluts of our measurements with 10000 ppi and 5000 ppi.
| Set resolution |
Bar element |
Resolution of the bar element |
Effective resolution |
| 10.000 dpi |
6.3 |
4096 dpi |
4347 dpi |
| 6.4 |
4598 dpi |
| 5000 dpi |
6.3 |
4096 dpi |
4347 dpi |
| 6.4 |
4598 dpi |
The Reflecta RPS 10M has an effective resolution of approx. 4300 ppi and so achieves about 86% of its nominal resolution of 5000 ppi in practice. One can see that a scan with 10000 ppi does not increase the effective resolution.
Note: The measured resolution can vary from model to model in a specific field.
What is the difference between Scan-Software and Firmware?
Firmware is also called hardware-based software. It is firmly embeded in in a programmable chip in different electronic devices as for example also in scanners. The producer of the device is responsible for the whole functionality. If therefore an operating system or certain parametres are required, the producer will determine them on the basis of the firmware. Thereby, the manipulations of the user are omitted.
The firmware priorly provides some functions for the control of the device, input and output routines, occasionally also comprehensive functions for the working tasks with memory, CPU and other components. In the case of personal computers, the firmware is for example the "Basic Input Output System", shortly BIOS. For most of the devices there are, from time to time, firmware-updates whith which errors in the existing functionality range can be improved or through which completely new functions are added. In the case of filmscanners, a firmware-update oftenly leads to an increase of the image quality, as the firmware also contains some important image processing algorithms.
Contrary to the firmware, the Scan-Software is the actual application programme whith which the user can scan his slides. It basically serves for the handling of the scanner with an abundance of possibilities of configurations. Professional scan-software as SilverFast additionally provides some high quality image processing algorithms that can compute from the raw data of the scanner an image quality of the highest level.
What is the advantage of updating the Firmware?
The firmware primary provides some functions for the control of the device, input and output routines, sometimes also more comprehensive functions for the work with the memory, CPU and other components. In the case of personal computers, the firmware is, for example, the "Basic Input Output System", short BIOS. For most of the devices there are, from time to time, firmware-updates whith which errors in the existing functionality range can be improved or through which completely new functions are added. In the case of filmscanners, a firmware-opdate oftenly leads to an increase of the image quality, as the firmware also contains some important image processing algorithms.
Where does one get the newest Firmware?
On the webssite of reflecta by clicking on the menue "download" and then on "software+driver". There, by scrolling down, one will find the last but one chapter Firmware. There, the current firmware for the reflecta DigitDia 4000 is ready for downloading. For the DigitDia 5000 there is no firmware update available yet.
Tip: How the update is accomplished is explained in the Intruction for the Firmware-Update, that can be also downloaded here.
Where do I find the newest CyberView version?
On the website of reflecta over the menu "download" and the submenue "software+driver" the newest version of CyberView can be downloaded.
Where does one get the newest software of SilverFast?
For the updating of your SilverFast-software, go straight to the download-area of the SilverFast-website, in order to get the latest update.The updates for the version 6.5 are free. In order to get straight to the download area of your update, your serial number of SilverFast and your e-mail address will be required
LaserSoft Imaging provides some smaller updates of the software of SilverFast on an almost weekly basis. Therein, some small bugs are fixed or small functions improved. Such updates are free of charge. In the version 6.5, the volume of functions has been strongly expanded, this is the reason why the updates from the version 6.x to the version 6.5 are with costs. Contact on the current version. We provide you any upgrade quickly and at a reasonable price.
How is a Firmware-Update accomplished?
1. You have downloaded the firmware-update for your scanner and saved in in a file on your PC, for example under C:\Firmware.
2. After having connected your scanner to your PC, open CyberView X.
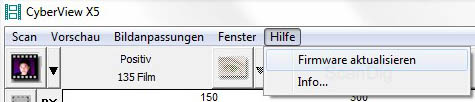
3. Choose Help in the menue bar.
4. Click there in the pulldown-menue on Update Firmware.
5. The following window requires the place where your firmware update is located. Choose in the line "search in:" your file, for example C:\Firmware DigitDia and mark thereafter your update-file.
6. By clicking on opening, the firmware is automatically updated. meanwhile, a small window appears with a task bar showing the progress of the update.
7. After the successful update you will be informed about it in a further window. Confirm this message with OK.
8. In order the update is taken over by the scan-programme, you have to finalise CycerView X and restart. Therefore, choose the menue option Scan and click on close
10. Confirm the following message: "Do you want to save the current configurations as standard?" with Yes.
11. Thereafter, first restart the scanner and then CyberView X.
12. On the website of Reflecta (www.reflecta.de) you will find some instructions for the firmware-update with the respective images of the pragramme windows by clicking on "Download", then "Software+Driver", or by clicking on "Download" and "Instructions+Catalogues".
There are strips on the image. What should be done?

If after the pre-scan or after the fine scan some strips get visible on the image (see vertical stripe in the adjacent image), one or more elements of the CCD sensor are either polluted or defect. Another reason may be an error in the scanner internal image data processing. In order to exclude this possibility, please, make a firmware update for your scanner.
While the CCD-sensor of a digital camera consists on a matrix of for example 3000 x 2000 CCD-elements and the outfall of one single element leads to a black or coloured dot on the image, as the CCD-sensor of a filmscaner consists on one CCD-line with for example 5000 elements. As an image is always scanned with the same CCD-sensor line by line, the outfall of an CCD element has an effect on each of the lines so that a vertical image strip results.
When dust gets into the interior of the scanner, e.g. if a dusty slide mount is inserted into the scanner, a tiny dust particle may land on a photo diode of the CCD sensor and may cause strips. In this case a slight spraying with Anti dust spray helps. In the case that after treating the sensor with anti dust spray there are still strips, probably the sensor is defective or the dust particles are so fix on the sensor element, that it can only be removed by a professional.
In this case it is recommendable to send the defect device to the dealer or straight to Reflecta. If the stripes result from dust, the cleaning never is made under warranty.
My RPS is damaged. What should be done?
The device must be sent for reparation to reflecta. Send the damaged device either through your dealer to reflecta or - in order to save time - straight to reflecta. You will find the adress of reflecta on the website of Reflecta under the menue item "contact". It is useful to contact reflecta in advance, since you will get a free parcel label if is a warranty case.
Is there no warranty card for the RPS 7200 / RPS 10M?
The reflecta RPS 7200 Professional / RPS 10M is delivered withoout any warranty card. A guarantee card the way one obtains it for example in case of Nikon devices within the scope of delivery does not exist in the case of reflecta. The purchase invoice is sufficient as proof of warranty.
How does the manufacturer limit the warranty in terms of scan nomber?
The manufacturer reflecta limits the warranty for the RPS 10M to 10.000 scans. A private person who buys a new RPS 10M in order to digitize his slide collection or film strip collrection, normally does not have a problem with this limitation. However, if you buy a used RPS 10M, you should check the counter before the purchase, i.e. if there is a warranty left or not.
By looking at this warranty limitation one recognizes that the reflecta RPS 10M is not built for a commercial purpose. If you use this scanner for a scan service or a rental service the limitation of 10.000 scans is exceeded very quickly. In the next chapter we describe how to read out the scan counter.
How can I read out the counter of the reflecta RPS 10M?
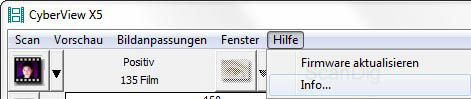
Within the CyberView scan software you can check how many scans you have already made with your RPS 10M. Therefore, please, click in the help menu on Info. Then a small windows opens. Here you can find the version of the firmware and the scan software. Furthermore you can read out the scan counter, which shows the nomber of scans done with that scanner.
Note: Depending on the scan software the counter counts differently: A scan might be a fine scan as well as an index scan, a preview scan or an interrupted scan.
Back to the FAQ index
|