Canon CanoScan 9000F Mark II test report
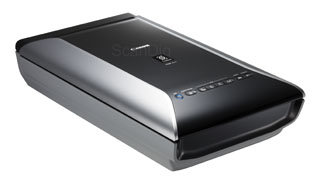
In April 2013, Canons flagship flat bed scanner model Canon CanoScan 9000F was replaced by the CanoScan 9000F Mark II. The subtle change of the product name already gives an inkling of the fact that there hasn't been too much changed with the device. Something of the kind we already observed in the analogy of the CanoScan 8800F and its follow-up model, the CanoScan 9000F.
The technical specifications of the CanoScan 9000F Mark II have not changed in comparison to its predecessor. Visually, the Mark II can be distinguished from its forerunner only based on the lettering and the logo on the lid of the scanner. The seven control keys in the front section of the scanner are completely identical, as well. According to Canon, the new CanoScan 9000F Mark II is technically identical to the previous model. Merely the software kit and the power consumption have been altered: whereas the precursor still featured the outstanding scan software SilverFast SE, Canon now relies on an application of their own. For the purpose of saving energy, the CanoScan 9000f Mark II comes equipped with energy saving features such as an auto power off function which kicks in after a specific idle time.
For its class, the CanoScan 9000F yielded a good price-performance-ratio in our detailed test report, not least due to the scan software SilverFast, which at the time, used to be included in the delivery. As already experienced with other scanners, a different scan application can make quite an impact both on picture quality and scanning speeds. The following test report shall illustrate how the CanoScan Mark II proves in practice - and point out the distinctions from the preceding model.
The Canon CanoScan 9000f Mark II has been taken from the market in April 2019. There is no successor for it.
Features, accessories and performance evaluation
Technically speaking, the CanoScan 9000F Mark II is a CanoScan 9000F: It features a DIN A4/Letter scan area covering a total range of 21,6 x 29,7 cm for reflective originals. For transparencies, the maximum area amounts to 6 x 22 cm. The FARE-Level-3 technology of the predecessor for automatic dust- and scratch removal is employed as well. Digitizing takes place with a maximum color depth of 48 bits and an optical resolution of 9600 x 9600 dpi. However, this is to be understood as a mere theoretical figure, since such extreme values make sense only with scanning high-resolution film material in the 35mm sector or below. The achievable resolution of flatbed scanners is de facto much smaller than the values stated by the manufacturers. For further information on this subject, please refer to the chapter Image quality.
The lid of the scanner can be swung open at an angle of 90 degrees. At 45 degrees, the lid locks in place, obviating the need for opening it all the way. For scanning bulky templates such as books, the lid may well be pulled out upwards by about 2.5 cm. It is not possible, albeit, to completely detach the lid, since the transparency unit housed within it is gated by cables pass through the very hinges connecting the body and the lid.
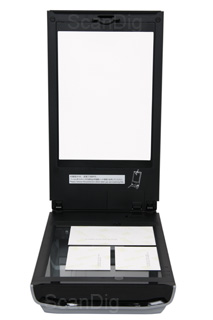
A white cover for scanning reflective originals is located on the inner part of the lid, which, for digitizing transparencies, has to be removed. Underneath resides the transparency unit. On the upper part of the lid, right next to the power button, seven additional keys are available. They are divided by topic; the leadoff large key will start the auto-scan, whereby the current film material will be automatically recognized and scanned. The next four keys serve the purpose of generating PDF documents - and the setup of the latter (color, grayscale, user-defined and cancel). Thereafter located is the key for copying and another for email-dispatch. The precise scan-parameters of the keys may nevertheless be adjusted in the custom settings of the scan software.
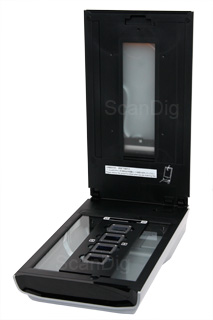
The box contents of the CanoScan 9000F Mark II are as follows: First of all, the required film mounts for usage in conjunction with the transparency unit - one film holder for one up to four mounted slides, one for 35mm film strips containing one up to six frames and one for medium format film strips with a maximum length of 22 cm. The latter may be in the shape of 6 x 4,5 cm, containing up to four frames, up to three frames in the format of 6 x 6 cm, or up to two, possibly three frames (depending on the width of the spacing in between the frames). The film holders are identical with those of the CanoScan 9000F and are placed directly onto the glass plate. They are then fixated at both upper and lower edge of the scan area by means of Positionierungshilfen. Furthermore included in the delivery are a warranty-card, installation guidelines and both power- and usb cable. The inclosed, thickly booklet is a quick guide featured in 19 languages. A more elaborate user guide may be installed altogether during the installation of the device. The (new) search function proves to be especially handy for locating the various (requested) topics. Insofar, nothing new under the sun...
The Mark II is distiunguishable from the CanoScan 9000F merely by means of the changed boxing - which comes in elegant black and white - and the software kit. Unlike the predecessor, the Mark II no longer comes equipped with SilverFast and ArcSoft Photostudio 6, but rather with the new Software My Image Garden. Details can be found in the chapter Software.
Installation and start-up
The first task is to release the "transport latch". To unlatch, all there is to do is slide a slide switch, which, once the lid of scanner is opened, can be found above the scan area, to the right side. Setting up and starting the device without prior unlocking can result in damage beyond repair. Yet, the warning notice glued to the device should render this behaviour impossible.
Important: In case of repacking for the purpose of resale, send-in for repair, etc, it is stringently required to re-lock the transport latch again. Otherwise, the scanner might be damaged during transport.
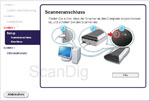
To assure that the correct driver for the CanoScan 9000F Mark II will be installed in the first place, proceed as follows: first, insert the supplied Software-DVD and install. An wizard will go along with the user throughout the whole procedure and gives instructions as to when to connect the Scanner to the PC via USB. Then connect the power cable, switch it on, and Windows will automatically look for the correct driver. After successfully installing the device, the wizard will display a promt and automatically open the online manual, which lists useful functions of the scanner to inexperienced users.
If desired, the user may also pick precisely which components of the software to install. Five options are available to choose: ScanGear (driver needed to use the sanner), the beforehand mentioned online manual (including information for troubleshooting), My Image Garden (scan- and image management software), QuickMenu (quick access to various scan functions and the manual of the scanner), and Adobe RGB 1998 (necessary for the accurate reproduction of colors of pictures withing the Adobe-RGB. For our test report, we installed all options. Alltogether, 864 MB were claimed - which is quite a lot for a scansoftware package. On our test PC, the installation process took 8 minutes. This time varies, depending on the components chosen for install.
At the End of the installation routine, a message pops up asking to participate in canans extended survey program. If answered in the affirmative, information on usage of the canon-scanner/-printer/-fax will be periodically dispatched to canon via internet. Whether this is reasonable or not has to be seen individually by the user. We strongly advise to read the information text thoroughly before taking a decision.
The link to the PC is established via USB 2.0 interface. The power supply is ensured through a common power cable. The power adapter resides within the scanner.
Scanning with the Canon CanoScan 9000F Mark II
Once the software-bundle has been installed, the means of operating the scanner will be quite overwhelming. First of all, the Canon QuickMenu pops up, including some kind of digital picture frame called "image display". The latter automatically rotates through the individual frames of a user defined folder of the PC.
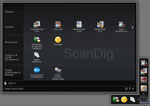
The QuickMenu can be found on the lower right side of the system tray and grants access to various functions of the scanner like picture-scan or document-scan. Those may be altered and changed to our liking. To do this, simply click the symbol entitled "main menu" in the corner of the QuickMenu to reveal additional features or add them to the QuickMenu via drag&drop, making them permanently available.
Another means of operating the scanner is unapparent at first glance: within the start menu, a program called IJ Scan Utility can be found, which has been installed with the software package. This little tool illustrates all scan functions in a crisp and neat way. We may now choose between automatic scan, foto-scan, document-scan, user defined scan, scan-and-stich (for scanning templates bigger than Din A4 (or rather the 21,6 x 29,7 cm of the whole scan area) and the driver of the scanner ScanGear, which provides us with the highest level of control over the scan procedure, offering a great number of settings.
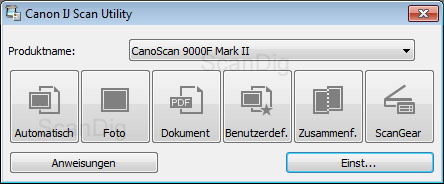
With one click of the button preferences scan parameters, the seven scan-buttons on the scanner itself, as well as all the beforehand mentioned custom buttons can be individually adjusted. For example, it can be defined that after completion, scans will be automatically opened with a certain program for post-production, eg. Adobe Photoshop ® Elements. Another means of direct integration into post-processing is the auto-transfer to a Cloud Service like Evernote or Dropbox. For this, the respective client application has to be installed on the PC, which can then be chosen in the settings menu of the corresponding scan-button of IJ Scan Utility, filed under Dispatch to Application. Through the button Instructions of IJ Scan Utility, the Online-Guide may be accessed.

Once the scan-buttons on the CanoScan 9000F Mark II have been adjusted as requested, operation will be very convenient. In most cases, the use of the buttons is the fastest and easiest way. By default, the buttons are set up to automatically fire up the scan- and post processing Software My Image Garden, revealing the scanned pictures in the matching directory. In this way, the software performs as a means of navigation between folders. Once a picture is clicked, the additional options unfolding at the lower edge indicate that the scan software offers much more than at first sight. Therefore, we will elaborate on the main functions of My Image Garden seperately in the paragraph The Scansoftware My Image Garden .
The Canon CanoScan 9000F Mark II can be operated in four different ways: via the QuickMenu, via the IJ Scan Utility, via the hardware-buttons on the scanner itself and via the scan software My Image Garden.
The TWAIN-driver ScanGear for additional control
The scanner-driver ScanGear may be chosen at various points: in the IJ Scan Utility, in the QuickMenu respectively the main menu or via the option Scannen in the software My Image Garden. Once chosen, a seperate window pops up, presenting the user with a basis- and an extended Mode to choose from.
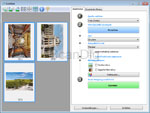
In basic mode, in source, the type of template has to be chosen - right after, the preview-scan may be commenced. On the top left, above the preview, the pictures may now either be turned, selected or deselcted for the final scan, or check / uncheck the auto image capture. With the image capture unchecked, the copmlete scan area of the scanner can be seen and borderlines may be dragged manually around the pictures.
We advise to turn on the automatic image capture, since in our tests it almost always succeeded in trimming the pictures correctly and thus saving the operator a considerable amount of time and hassle. The settings can be adapted for every individual picture using the the preview.
After the PreScan, the user may pick between several options from the menu destination: print, scan presentation or OCR (predictive text). The latter all embody predefined settings. If the target is set to print for example, the reflective originals will be scanned with a resolution of 300 ppi. A manual input of resolution is not possible in the basic mode.
If necessary or desired, a precise output format may now be chosen. Also, the automatic color- and frontlightning- correction may be turned on. The changes of colors will be visible immediately in the prescan and can be balanced against. In case the pictures have a tint or if the user wished to incorporate a particular color effect, this can be accomplished through the menu color pattern, by adding certain tint to the respective prescan using a small matrix offering a range of shades. Now simply click the button scan and the chosen pictures will be scanned with the specified settings.
After having scanned the pictures, ScanGear will ask by default, whether additional pictures are to be scanned or else, the pictures should are to be opened in the software My Image Garden for post production. On demand, the dialogue box can be set up to be hidden for future instances.
To sum up, we can say that it's child's play to scan an entire collection of reflective originals in various sizes. Simply place as many prints as possible on the scan area, kick off the prescan utilizing automatic image capture and finish the process by fine scanning the set.
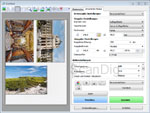
For those that would like to configure everything from from input - via output - through to image settings, the tab advanced mode comes to use. Here, besides resolution and output format, the image settings may be tuned precisely. Notably the function dust- and scratch reduction should be turned on at all times. With transparent originals, this function performs miracles and thus, renders a subsequent, manual dust removal in post production almost unnecessary. Underneath, small symbols grant access to usual correction tools to tweak saturation, color balance, histogram - and gradation settings. In the menu presets, the behavious of ScanGear, plus additional parameters may be matched to the indidividual workflow.
For transparency scans, the procedure is quite similar. Since the film material is being held in a preassigned place using the film holders, and thereby on principle are recognized correctly, there's nothing to argue against the use of the preview, utilizing miniature views, just as the use of the auto image acquisition, since the picture frames will be smoothly auto-recognized due to the predefined position of the material.
The ScanGear basic mode is convenient for inexperienced users wanting to simply scan in a snap. The advanced mode is intended for users looking for a user-defined set up of all options.
Sadly, we experienced differences in certain situations, depending on our choice of program to open ScanGear with (My Image Garden vs. IJ Scan Utility). We noticed this when we made an effort to test-scan with high resolution: ScanGear refused to fine-scan a 35mm transparency at the chosen resolution of 9600 ppi, asking to either reduce the scan area, or the output size, or the resolution. We felt a bit cheated here: If the device packaging states 9600 ppi, the scan software should be able to deal with the resulting - large amounts of data.

We found an answer to this problem in the online manual. The menu item large format scans has to be acitvated in the settings of ScanGear. At this point, it's crucial that the ScanGear-setting are opened from the tool IJ Scan Utility and not through the software My Image Garden - the settings of the latter do not offer the aforementioned option. Hence, large material cannot be digitized via My Image Garden but only via IJ Scan Utility, using the QuickMenu.
We would have saved ourselves lots of time, had we known beforehand that large format scans are made possible only with this particular, hidden setup. The error message does not make this evident. Furthermore, one would scarcely assume different preferences to pertain to the same scanner driver depending on which program it is accessed by. Herein lies a lack of consistency regarding the programs, even if in the field, the digitalization of material at resolutions as high as 9600 ppi will probably be a rare case with with the CanoScan 9000F Mark II.
Scanning of reflective originals, documents and prints
Scanning of reflective originals (paper originals, documents, photographic prints etc) is a snap with the CanoScan 9000F Mark II. Simply place one - or several originals on the glass plate and choose one of the abovementioned ways of operation. We start the Canon software My Image Garden and navigate to the menu item scanning. Here, we are presented with the very same options as in the Canon IJ Scan Utility.

With just one click on Photo do we start the scan, and the scanned pictures pop up in the midth of the screen - which functions as a clipboard, within just a few seconds. These pictures may be enlarged, turned by 90° and even trimmed down in the preview, in case the automatic image acquisition didn't work flawlessly. This is rarely the case; even when we placed the images very angular on to the scan area of the CanoScan 9000F Mark II, they were automatically aligned and auto trimmed correctly.
After the pictures have been adapted to fit the needs, the required images are chosen. After clicking the scan-button, a small windows opens up, dispaying the saving destination and the file format (jpg/tif/png/pdf). A click on save will confirm the settings. The pictures in the software-clipboard will stay there even after shutting down My Image Garden and may be saved again in a different file format and at a different location upon opening the software anew. However, we advise to delete the pictures from the clipboard once they have been saved, since the additional memory required to save them might eventually fill up the RAM and hence slow down the computer.
At the standard resolution of 300 ppi, the Canon CanoScan 9000F Mark II scans reflective originals within just a few seconds. At higher resolution, the scan time increases just slightly. The main field of application of the CanoScan-series is and shall remain scanning reflective originals.
Operators seeking for more control over the scan process and setup of individual scan parameters are advised to use the TWAIN-driver ScanGear.
Scanning of framed 35mm slides using the Canon CanoScan 9000f Mark II
For scanning tranparencies, first of all the cover inside the lid of scanner has to be removed to uncover the transparency unit. Then the film holder is to be placed upon the scan area and aligned using the positioning aid on the edges. The slides will now pe placed directly onto the glass plate inside the gauge, with the side of view facing downwards. Cutouts to both sides provide for an easier removal of the slides with the hands.

Since framed 35mm slides are simply inserted, it's possible to scan slides of any kind of frame thickness. Loading the holder is possible only while it's resting on the scanner, which makes operation somewhat inconvenient. Care must be taken to not leave any fingerprints on the slides or the scan plate of the scanner. To avoid the latter, it is advised to wear cotton gloves. In case the Scanner were to get dirty anyhow, with special scanner-cleaning sets, we'll have the glass plate sparkling clean in not time.
Digitalization of transparency material will always be more of hassle using a flatbed scanner than using a proper film scanner. The small transparency unit of the CanoScan 9000F Mark II renders this circumstance even more uncomfortable. Since a total of only 4 slides may be scanned at once, processing of large amounts of slides will mean a constant interchanging of templates. Due to the stencil-esque form factor of the film holder, it is not possible to equip a spare one while the other is being scanned. The work flow is as follows: Equip the holder with slides, scan, remove and start over.
Scanning of framed 35mm slides is a troublesome affair due to the stencil-esque construction of the film holder. The slide scanning functionality should be considered solely as an additional featured, as it can never compensate for a full-fledged film scanner.
Scanning of 35mm film strips with the Canon CanoScan 9000f Mark II
The supplied 35mm film strip holder can hold a total of two film strips with up to six images each. Hence, a maximum of 12 pictures may be scanned per cycle. A mounting with shorter film strips is possible, as well.


Sadly, this film holder does not seem to be thoroughly thought-out neither. Admittedly, it offers a locking mechanism for each film stip, but once open, it does not provide any grip. As a result of this, several short film strips will inevitably shift on closing the latch. Merely at the ends of the holder, close to the hinges, two aligning plugs provide for a minimal amount of fixation. In case of domed film stips, four hands are necessary for fixing and closing the holder.
The automatic arrangement of individual pictures works marvelous with film strips (just as with slides). Short and long strips are usually recognized and scaled correctly. With dark scenes, the automatic scan feature does tend to become faulty, since the spacing in between the frames is hardly distinguishable from dark sections of the frame. With correctly exposed frames, one can rely on the miniature previews of the prescan. Empty sections of the film holder are being recognized and not skipped during scanning. Half-formats and panorama formats can be scanned as well. For this, all that has to be done is to drag the respective scan-frame in the preview of the entire transparency unit.
As opposed to the slide holder, for scanning film strips, a secondary film strip holder is a worthwile investment, since it can be equipped while the other one is being scanned. This alleviates and accelerates the entire workflow by large.
Similar to the work with slides, here too the usage of cotton gloves is very commendable, for the very same benefit, i.e. avoiding finger prints on the film material and the glass plate. An ideal tool to handle film strips are the purpose-built tweezers to grip the film strip. This makes working a lot easier and rids one of the fear of leaving any fingerprints on the precious film material (which will always be clearly visible after digitalization.
Scanning of film strips - and notably equipping the holders - is fiddly since they seem to not be thoroughly thought-out. However, two holders can be used in a work-saving manner: While one is being scanned, the other is being loaded.
Scanning of medium format film with the Canon CanoScan 9000f Mark II
The medium format film holder of the CanoScan 9000F Mark II is capable of housing a film stip with a total length of up to 22cm. Accordingly, up to four pictures of the size of 4,5 x 6 cm, three pictures of the size of 6 x 6 cm, two of the size 6 x 7 cm or (if the gaps in between the frames are narrow) even two of 6 x 8 cm, two 6 x 9 cm, or one panorama format 6 x 12 cm frame may be loaded. Panorama format 6 x 12 cm can be scanned, too.


We have to cope with the same problems as with the 35mm film strip holder: If the strips are in one piece, there's no hassle whatsoever. In case of individual pictures or domed material abundance of patience is needed. The two positioning pins simply do not provide enough fixation. Upon closing, the beforementionned problem of shifting occurs.
Additionally, a small plastic card of the same width as medium format film, is supplied together with the medium format film holder. The purpose of which is to help with domed or shortened medium format film strips by placing it at the very end of the film stip not residing on the edge of the film holder, thereby, preventing blooming due to shortening - or lack of focus due to arching of the film.
The automatic segmentation of the pictures works flawlessly. If in the section "picture format", the auto segmentation has been activated, the format does not have to be chosen anymore. In our tests, this feature was absolutely reliable with correctly exposed frames. The scan area can be costomized if needed, e.g. for scanning special formats such as 6 x 17 cm (maximum up to 6 x 22 cm) panorama format.
For handling film material, it is strongly advised to wear cotton gloves or use a set of purpose-built tweezers for gripping the medium format film strips, thus preventing damage or dirtying of the film material. The medium format holder can be loaded outside the scanner. Hence, buying a spare medium format holder makes perfect sense, as it functions not only as a backup, but near doubles the work efficiency: while one holder equipped with film material is being processed in the scanner, the operator can make use of the spare time by loading the secondary holder.
Scanning unframed medium format film works properly with CanonScan Mark II. However, a good deal of patience is needed for loading the holders. Two holders of the same kind can be efficiently used together in the same manner: One is being loaded while the other is being scanned.
The software My Image Garden of the CanoScan 9000F Mark II

As previously mentioned, My Image Garden functions not only as scan software, but also as image editing and image management. In the directory tree to the left side, every single folder of the hard drive can be chosen. The contents will then be displayed in the main window to the right. Depending on how many subdirectories the particular folder holds, this part of the process may eat up some time. Furthermore, only the file formats supported by the software and the pdf format are being displayed. To the bottom of the software, various tools for post processing of the pictures are available to choose from. For instance, one or more image files may thus be converted to a PDF document. Subsequent adding of additional pictures to the PDF is optional.
If we click upon an image file, we get several Buttons to choose from besides the PDF conversion. Amongst them are New artwork, adjust/revise and special filter.
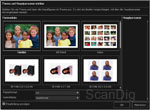
New artwork: underneath the button new artwork, a submenu unfolds, holding the options photo-layout, collage, map, calendar, label, volume label, video-layout and paper model (premium content). After choosing one of the categories, one may then choose from a huge list of suggestions in order to individually design the own works for subsequent printing. At the bottom edge of the newly opened window, paper format and orientation (portrait vs. landscape format) can be defined.
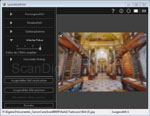
Special filters: with one click on the button special filter we get to choose from various filters to be applied to our picture and subsequently save it as new file. The optional filters are fish-eye effect, miniuature effect, toy camera, soft focus and fuzzy background. The filters may well be applied multiple times - or, if desired, in combination. In this way, abstruse - and in part, very interesting pictures can come off. For professional use within digital post production, these filters are not suitable. Fot such purpose, we recommend professional image editing software such as Adobe Photoshop® or Adobe Photoshop® Elements.
Adjust/Enhance: If a picture is chosen and the button adjust/enhance is clicked, a dialogue opens displaying a preview of the very picture in the right section of the screen. Standard operations such as turn, mirror and trim can be found alongside various viewing preferences in the toolbar above the preview. In the left section, there are two tabs: auto and manual. Underneath the first, the automatic photo correction can be found. Using this function, a fully automated image enhancement can be performed, which can access the exif-information if necessary, or the settings for the sharpening of the face and the digital smoothing of the face can be individually adjusted. A tad cumbersome is the fact that after choosing a item, the user has to confirm via the "ok" button, before resulting changes become visible in the preview on the right hand. Via reset featured picture the user can switch back to displaying the original picture.
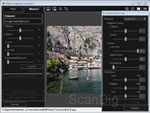
In the tabmanual the two items adjust/enhance (again the same lettering at this point) can be found. In the first one, brightness, contrast, sharpening and blurring can be arranged by the use of controllers. Other than in the tab auto, here the user does not need to confirm via ok-button. The changes thus are effective immediately and being displayed through the preview. With one click of the button advanced, further control over functions such as tonal values and color balance is gained.
Strangely enough, after clicking on adjust, the mentioned settings will not be visible directly underneath (as one would expect, since this is the case in the editing menu special filter), but rather underneath the lettering adjust/enhance, so that optically, we had the impression of being in the submenu adjust/enhance. One click on the latter will mainly show the settings for the facial retouching plus a spot correction tool. For most of the various settings, a certain area has to be selected beforehand in the preview picture, for the tools to work correctly. This is the case for example with the red-eye-correction tool.
Besides scanning, the software My Image Garden serves both as a picture editing - and picture management tool. It offers plenty of design functions for amateurs. Sadly, some of the base functions are cumbersome to reach, and the operation proves to be unintuitive.
All in all, the software My Image Garden offers sufficient functionality for inexperienced users right up to advanced scanner operators. Sadly, funcions are partially cumbersome to find. The menu-depending, varying means of operation and the fact that letterings pop up several times, such as in the case of the adjust/enhance showing up in the invoked menu adjust/enahnce, make operation little user friendly and may lead to confusion with inexperienced users. Furthermore, one gets the impression that the graphic user interface has not been entirely thought through. This makes for an increase of time necessary to accustom to in working with the program.
Further additional functions of the software My Image Garden
Hereinafter we outline and elaborate on further funtions of the software My Image Garden.
My are: Here, all collages, cards, picture-layouts, etc., which have been generated using the button new artwork will be automatically saved.

Calendar In this view, the respectively scanned pictures will be displayed in a calendar grid, giving a constant overview of what pictures have been processed. A day view will open upon double-clicking a picture, containing all pictures scanned on that very day. This proves to be a nice add-on in the case of searching for a specific picture of which the relative time of scanning is known, saving the trouble of searching in vast amount of pictures potentially scattered across several folders.
Event:In the monthly view of the calendar, one can choose save event in the icon bar to the bottom. Thus, all pictures taken on a specific day, eg. a birthday, can be attributed. This event will then constantly be on display in the item event. In this way, an entire list of events can be built, which can then easily be surveyed from My Image Garden.
People/unsaved people: For scanning people, the software features automatic face detection. The automatically detected faces can be assigned to names. Captured but unsaved people can subsequently be tagged with names and managed via the item unsaved people.
Picture upload websites: Search the internet for pictures and download them here. Using the non-certified Flickr-API.
Video capture: In this section, stills can be exctracted from videos. In order to use this function, the canon picture editing software from a canon digital camera or a canon digital video camera has to be installed.
Download premium content:This is a premium content service available to users using original canon inks - which are recognized as such from the software. Among other things, paper models may be downloaded, printed, and thereupon arranged in an origami manner.
Summary, verdict
While Canon had the predecessor model equipped with a ragbag of software, they go by another route with the CanoScan 9000F Mark II, featuring a full package for picture editing and - managing, by supplying the buyer with the new software My Image Garden. The average user can manage everything necessary using this software in order to make his scans with the CanoScan 9000 F, to order and edit his pictures.
In the process of developing this software though, Canon might have missed out on the fact that these days, even absolute beginners have more than a flatbed scanner for the generation of digital pictures at their disposal, but rather a number of digital cameras, from smartphones, to compact cameras, to digital single lens reflex cameras (plus additional picture sources such as the internet, friends, etc.).
As much as it is commendable to provide the average user with an all-in-one solution for picture editing and image enhancement, it is of little uso to those seeking for a means of managing and editing all his pictures withing just one software. Thus, many customers buying the Canon CAnoScan 9000f Mark II will turn their backs on the Software My Image Garden and rather use programs like Adobe Photoshop ® or ACDSee Pro for managing and editing their ready-made scans.
Image quality of the Canon CanoScan 9000F Mark II
As a typical flatbed scanner, the CanoScan 9000F Mark II is designed for scanning reflective originals. For scanning prints, the scanner performs - due to the equal hardware specifications - equally good as it's predecessor. Documents and pictures can be digitized within the shortest of time. Resolution and density range of the device suffice absolutely. For scanning film material, however, higher resolutions are necessary. To achieve lossless detail in scanning a 35mm slide at an output size of 20x30 cm and a resolution of 300 ppi, it has to be digitized at 2500 ppi or more. So let's do a resolution test:
Resolution of the CAnon CAnoScan 9000F Mark II
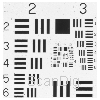
The resolution test using the USAF-testchart yields an actual avarage resolution of approximately 1700 ppi according to our resolution chart, the same value as the predecessor CanoScan 9000F. This comes up to about 17% of the rated value of 9600ppi. The attained resolution value is hence still too low to scan 35mm material for an output size larger than 13x18cm without degradation.
A scan of a 35mm slide at 1700 ppi yields an image file of approximately 4 megapixels. In order to reach these 1700 ppi, it is necessary to scan at 4800 ppi or more. At 4800 ppi we obtain an image file with approximately 32 megapixels. Of these 32 megapixels only 4 million actually contain information. The remaining pixels are simply duplicates. That's why all resulting files are bloated and should be reduced to the actual 4 megapixels afterwards by means of an image editing software.
Talking image size, 4 megapixels stand for approximately 12 megabytes, while 32 megapixels account for almost 100 megabytes. Reducing the bloated files to the actual size will be best achieved in a picture editing software through bicubic interpolation, thus reducing loss to a minimum. A powerful computer and lots of time are needed for this task. Sadly, the production of such bloated files making necessitating a subsequent, extensive and time consuming condensing is a characteristic phenomenon of flatbed scanners.
The Canon CanoScan 9000F Mark II yields image files containing an actual 4 megapixels. Nowadays, even smartphone cameras outbeat this resultion by far.
Taking into account the fact that a sound 35mm slide contains as much as 20 million pixels of raw information, the actual 4 millioni pixels produced by the Canon CanoScan 9000F Mark II equal to only about 20% of the actual value. Proper film scanners delivering an actual resolution of 3000 ppi or more, make use of almost the entire information stored in the original.
The automatic dust- and scratch removal FARE

The FARE-technology for automatic dust- and scratch removal serves well for scanning both reflective originals and transparencies. The hit ratio for dirt particles accounts for more than 90%. On our info page on the various dust- and scratch removal methods more information regarding this topic can be looked up.
The alongside picture illustrates the very statisfactory results yielded by the FARE technology of Canon. Even chunky dirt particles will be smoothed out as if they had never existed. The FARE technology of Canon has been working very well all along, even with models that are not on the market any more.
Image quality of the Canon CanoScan 9000f Mark II coupled with SilverFast
Since November 2013, three versions of SilverFast are available For the Canon CanoScan 9000F Mark II: SilverFast SE, SE Plus and Ai Studio with IT-8 calibration. Detailed information on the distinctions between the SilverFast versions and the individual functions of the software can be found on our page SilverFast Questions and Answers. In SilverFast, numerous options for optimizing the scans at our disposal. The algorithms for image editing work significantly better in Silverfast as opposed to Canons ScanGear software. In the following, we depict the quality enhancement we experienced while using SilverFast by reference to some sample pictures. For this purpose, we used both slides and negatives.
Dust- and scratch removal iSRD
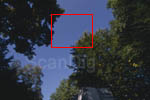
SilverFast also features a dust- and scratch removal tool. Instead of Canons FARE feature, SilverFast uses the so called iSRD. iSRD uses the data picked up by the infrared channel to remove disturbing particles just like FARE does. If you click the adjacent picture, the red marked image section will open up in 100% zoom. Then, the picture will alter between the scam with and the one without dust- and scratch removel. For better recognition of the defiled areas, they have been marked red. Especially in the homogenous areas of the sky, it is clearly visible that the iSRD feature works very well with the CanoScan 9000f Mark II.
NegaFix-dialogue for scanning negatives
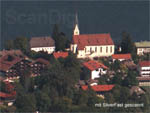
The Negafix-Dialogue serves as a means of choosing the correct type of film with the help of a table, and using the thereunder saved, colored presets. This procedure is quite timesaving in regard to post-processing. The function is available to users of all three versions of SilverFast. In the Ai Studio, additional NegaFix-profiles may be custom-saved. The canon software cannot draw distinctions between different negative films. Here, the color- and brightness controls have to be hand-tuned or - alternatively - the user has to rely on the auto correction. If you click the sample picture, the picture will alter between the scan achieved with SilverFast using the Negafix-dialogue and the Scan achieved with Canons ScanGear software. It is clearly visible, that the former delivers colors more accurate and outranks the latter in terms of contrast.
De facto, the procedure is as follows: Beforehand scanning a film, the matching profile is chosen in the negafix-dialogue. Then, all pictures of this film are scanned using the particular profile. Since many photographers have been using the same film throughout their career, it is possible that this is to be set up just once.
Quality enhancement due to MultiExposure

The function MultiExposure is available both in the SilverFast SE Plus version, as well as the SilverFast Ai Studio Version. The tool is called ME in the software and serves as a means to increase dynamic range. This is accomplished by a multiple scan of the same picture with different exposure settings. Especially for flatbed scanners which naturally offer little dynamic range, this a very useful tool. As can be seen in our sample picture, in this way, detail will be preserved in dark areas of the scene. Hereto, a close examination of the bushes to the right side of the picture in the alternating frames of scans both with and without MultiExposure will make it abundantly clear that the MultiExposure scan delivers so much more of the original information.
Multi-Exposure does increase scanning times, however it is a function which can confidently be switched on at all times. It does retrieve much more detail in the highlights and shadows, especially when scanning high contrast film material and when scanning low contrast material, no harm is done. According to Lasersoft, the producer of Silverfast, the software can well increase the dynamic range by as much as 1 f-stop, which accounts for a huge quality improvement.
Quality enhancement due to IT-8 calibration in SilverFast Ai Studio

We have performed a series of Scans with the Canon CanoScan 9000F Mark II using Silverfast Ai Studio. The main benefit of the AI Studio over the SE Plus version lies in the IT-8 calibration. The scanner can be calibrated with the optionally available Targets (IT-8 calibration slides respectively IT-8 reflective targets) from Kodak, Fuji or Kodachrome. Using the auto-IT-8 calibration this can be done with just one mouseclick from the SilverFast software. In this process, an IT-8 calibration slide is being scanned. Then, the results are being compared to the reference values. The resulting differences are saved in a correction profile which henceforth is being applied in every scan (slides only). Thus, by use of the IT-8 calibration, the color abberation of the scanner is corrected at a central position - instead of individually optimizing the colors of every single slide in an image editing software.
If the sample picture is clicked, the picture will open and the view will shift between the calibrated and the non-calibrated scan. It becomes very apparent that eg. in the foreground of the road, the colors of the calibrated scan are rendered much more natural, i.e. the grey seems to be more "neutral grey" than in the uncalibrated scan. The latter seems to have rather reddish-yellowish tone. The IT-8 calibration obviates tedious and hours-long post-production. The resulting scans will allways be color-accurate, since the abberation of the scanner has been corrected once and for all.
Conclusion: image quality
The image quality of the Canon CanoScan 9000f Mark II can be significantly increased by using the SilverFast Scan-Software. While the predecessor model Canon CanoScan 9000f used to standardly carry SilverFast alongside, the new model ships only optionally with SilverFast Bundle.
For scanning negatives, the cheaper SilverFast version SE will suffice since, due to its NegaFix-settings, it already produces much higher quality results than the Canon software. The SilverFast Version SE Plus offers the best value for money ratio, since it is available for a small price premium. It already features the multi-exposure feature, thus delivering much better image quality comparing to the standard Version due to multiple exposure scans. Naturally, SilverFast Ai Studio is the perfect Scan-Software, especially if coupled with the benefits of a color calibrated scanner. It offers the biggest variety of settings to achieve best results - and due to the color calibration, the resulting scans need little post-production. Not only does the IT-8 calibration work for film material, but also for reflective originals, eg. for scanning prints or documents.
The Canon CanoScan 9000f Mark II offers the best price-performance ratio if bundled with the SilverFast SE Plus scan-software. Thanks to multi-exposure, the resulting scans are of much better quality than those of the standard scan software from Canon.
Scanning speed of the Canon CanoScan 9000F Mark II
Just like the predecessor, the Canon CanoScan 9000F Mark II makes scanning reflective originals quick and easy. The prescan of a DIN A4-original (210x297 millimeters) will take about 3 seconds at 300 ppi with automatic dust- and scratch removal turned on. This means that documents are quickly imported into the computer and, in case the scanner is used as an input device for a copy process, hence the copy will likewise be promplty produced. The scanning times will increase considerably if high resolutions such as 1200 dpi are chosen.
The same holds true for 35mm slides and negatives: A scanning duration of 3-4 minutes for a 24x36mm sized transparency original at a resolution of 4800 dpi is only just acceptable. In case of scanning at the highest resolution of 9600 dpi, scanning times verily explode. 22 minutes is simply not acceptable for a 35mm negative scan.
The bigger the transparency in question, the higher the scanning times. For a 6x7cm sized medium format at 4800 dpi, the CanoScan 9000f Mark II needs 7 up to 54 minutes. If the resolution is doubled to the maximum of 9600 dpi, several hours should be scheduled for the process. Suchlike scanning times are certainly inacceptable.
| Procedure using Canon ScanGear |
without FARE |
with FARE |
| Pre-scan |
0:03 min |
0:03 min |
| DIN A4 (210x297mm) reflective scan at 300 ppi |
0:08 min |
0:09 min |
| DIN A4 (210x297mm) reflective scan at 600 ppi |
0:12 min |
0:15 min |
| DIN A4 (210x297mm) reflective scan at 1200 ppi |
1:25 min |
1:30 min |
| 35mm positive scan at 2400 ppi |
0:30 min |
1:01 min |
| 35mm positive scan at 4800 ppi |
0:50 min |
2:50 min |
| 35mm positive scan at 9600 ppi |
2:10 min |
4:24 min |
| 35mm negative scan at 2400 ppi |
0:52 min |
1:51 min |
| 35mm negative scan at 4800 ppi |
1:38 min |
4:25 min |
| 35mm negative scan at 9600 ppi |
17:17 min |
21:57 min |
| Medium format 6x7cm positive scan at 2400 ppi |
0:45 min |
2:20 min |
| Medium format 6x7cm negative scan at 2400 ppi |
1:03 min |
2:51 min |
| Medium format 6x7cm positive scan at 4800 ppi |
1:20 min |
36:49 min |
| Medium format 6x7cm negative scan at 4800 ppi |
45:00 min |
54:00 min |
| Medium format 6x7cm positive scan at 9600 ppi |
ca. 3 1/2 h |
ca. 4 h |
| Medium format 6x7cm negative scan at 9600 ppi |
ca. 2 1/2 h |
ca. 3 h |
The times in the above table have been determined with our test device, equipped with a core i3-2100 processor clocked at 3,1 Ghz and 8 GB of ram. The scanner was connected via USB 2.0 and the scans were made using Canon ScanGear through Canon IJ Scan Utility. Automatic image correction was turned off. For the comparison, FARE was used on medium.
In the following table, you find enlisted the scan times we determined using the same device and the same pc, but SilverFast SE Plus instead of ScanGear. Comparing the two tables, it is apparent that scanning times are similar at lower resolutions, whilst the Canon Software has a slight winning margin. On the contrary, when scanning at the highest resolution of 9600 ppi, SilverFast SE Plus takes the lead in terms of speed.
| Procedure using SilverFast SE Plus |
without iSRD |
with iSRD |
| Pre-scan |
0:07 min |
0:07 min |
| DIN A4 (210x297mm) reflective scan at 300 ppi |
0:10 min |
0:13 min |
| DIN A4 (210x297mm) reflective scan at 600 ppi |
0:23 min |
0:36 min |
| DIN A4 (210x297mm) reflective scan at 1200 ppi |
2:04 min |
2:51 min |
| 35mm positive scan at 2400 ppi |
0:31 min |
2:25 min |
| 35mm positive scan at 4800 ppi |
0:49 min |
3:04 min |
| 35mm positive scan at 9600 ppi |
1:18 min |
6:14 min |
| 35mm negative scan at 2400 ppi |
0:46 min |
3:13 min |
| 35mm negative scan at 4800 ppi |
1:31 min |
4:32 min |
| 35mm negative scan at 9600 ppi |
3:46 min |
12:49 min |
| Medium format 6x7cm positve scan at 2400 ppi |
1:35 min |
7:22 min |
| Medium format 6x7cm negative scan at 2400 ppi |
1:33 min |
7:22 min |
| Medium format 6x7cm positive scan at 4800 ppi |
4:30 min |
32:10 min |
| Medium format 6x7cm negative scan at 4800 ppi |
4:35 min |
1:19 h |
| Medium format 6x7cm positive scan at 9600 ppi |
1:51 h |
3:36 h |
| Medium format 6x7cm negative scan at 9600 ppi |
1:15 h |
ca. 5 h |
Scanning times of 10 to 20 seconds for scanning paper originals are in general quite fine, if not entire folders of documents need to be archived. However, scanning times in the region of half an hour and up to several hours for medium format film material are unacceptable.
The Canon CanoScan 9000f Mark II is a very slow scanner. For scanning large sized transparency originals in high resolution, scanning times are not acceptable any more. For paper originals and 35mm film material, scanning times are all right.
The mere comparison of the scannnig times as depicted above make the Canon CanoScan 9000f Mark II clearly recognizable as a Scanner intended for digitizing mainly paper documents and photographic prints. The capability of digitizing slides and negatives is a very fine, additional feature, but will never become the main application of this device.
Conclusion, Summary
The CanoScan 9000F Mark II is principally a CanoScan 9000F (predecessor) with another software. Instead of Adobe Photoshop® Elements and SilverFast, the image-managing and image-editing software My Image Garden is shipped with the device. Hence, in it's class, it remains an allround device with a good cost-benefit-ratio and good image quality for scanning documents. For scanning slides and negtives however, the results are rather sobering. Comparing to the predecessor CanoScan 9000F, the scanning times are frightening. For those looking to digitize mainly film material, we advise to reach for a proper film scanner.
Sadly, the image quality of the CanoScan 9000F Mark II is to be classified below that of the CanoScan 9000F, since it ships without the professional scanning software SilverFast. The software My Image Garden does provide adequate means for managing ones collection of pictures, as well as the means for the one or other image editing - however the handling is partly inconsistent and not clear enough to be intuitively and smoothly used. It seems like the software is intended to cover a large range of duties, but fails at managing any of the tasks properly. Also, the myriad ways to operate the scanner through various tools make for a confusing handling.
By contrast, ii the Canon CanoScan 9000F Mark II is used with the optionally available scanning software SilverFast, the achieved results are of the same image quality as those of the predecessor model - and much better than those obtained from Canons Software. The best image quality will be generated by using the Canon CanoScan 9000f Mark 2 together with SilverFast Ai Studio software. The best compromise between cost price and image quality and hence a very good cost effectiveness is attained by using the Canon CanoScan 9000f Mark 2 with SilverFast SE Plus.
Back to the film scanner tests index
|