Test report film scanner Reflecta x66-Scan
In June 2021 Reflecta came out with a new medium format scanner the x66-Scan, with a CMOS-Basis. You could call it the successor of the Reflecta X120-Scan. Even if Reflecta dosnīt present it as the direct succssor.
Actually the Reflecta x66-Scan isnīt even really a classical scnner, more so a photographic machine. An inserted film is not scanned line by line but photographed digitally. The images are stored on an SD memory card, so you don't need a PC to operate the scanner (the camera). Like a digital camera, the X66-Scan has an integrated display so that the images can be viewed directly on the display.
Equipment, accessories and performance data of the film scanner.
When unpacking the Reflecta x66-Scan, we were immediately surprised in a very positive way: A small, very nice manual is right at the top of the box. The 20 small pages explain to the user the main features of the x66 scan, how to load film into the film holders and how to feed the film holders into the scanner. The small manual is seperated into several languages, something one wishes to see as a newcomer.
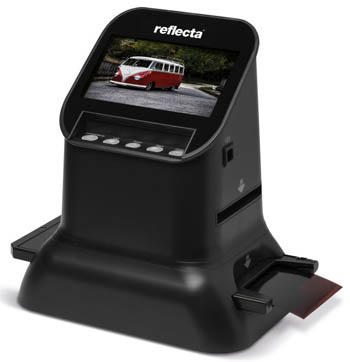
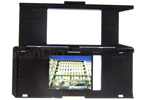
But now to the device itself: The Reflecta x66-Scan is a multi-format scanner that can handle numerous film types. The standard medium format holder can be used to digitize medium format films (type 120) in the formats 6x4.5 to 6x9cm. The medium format holder also includes an insert that can be used to reduce the scan area to 4x4cm 127 films. The slide holder can hold 6 mounted 35mm slides in landscape orientation, and the film strip holder can hold a filmstrip up to 6 frames long.
The device has an integrated CMOS chip. With this, it photographs the inserted film like a digital camera. The CMOS chip has 14 megapixels and thus corresponds to an average smartphone camera. According to the manufacturer, the maximum resolution is 4584x3056 pixels. This resolution is independent of the film format, i.e. a 24x36mm 35mm film is reproduced with the same number of pixels as a 6x9cm medium format film. An interpolation mode is used to increase the resolution to 22 megapixels, but this only increases the image size, not the sharpness.
The Reflecta x66-Scan works completely independent of a PC. As with a digital camera, the captured images are stored on an SD memory card, but this is not included with the scanner. SD cards with a size of up to 128 gigabytes are supported. This should also be enough for mass scans. Thus, the device works PC-independently and is powered via a mini-USB power supply. The device is operated via 5 push buttons on the front of the device and via a display on the top of the device. The display has a size of 4.3 inches (10.9 cm) and is also used to display the scans. The device can also be connected to an external monitor via an HDMI-A cable.
The device itself is very compact and has dimensions of 117x118x192 mm (length x width x height). It weighs a mere 580g. Thus, it does not take up much space on the desk. The scan speed is specified by the manufacturer with 2 seconds per image. The short time can hardly be measured, because it is not really scanned but only a photo of the inserted film is taken. The actual scan time does not play a significant role in view of the effort required to load the film into the appropriate film holder.
The scans or better said the photos are saved on the inserted SD card. However, only the compressed JPG format can be selected as the graphic format. An uncompressed format like TIF is unfortunately not available. The device and its operation are deliberately kept very simple, so that you can get started right away after a minimal training period. Apart from the basic settings for the film format or the film type (positive, negative, black and white), there are not many setting options. Since the films are simply photographed and not scanned, there is no hardware dust and scratch removal as is actually usual with film scanners.
Start-up and scanning with the reflecta x66-Scan
To put the scanner into operation, insert an SD card (not included) into the slot on the back, connect the scanner to the power supply via the USB cable and the mains plug and press the middle of the 5 push-buttons marked Power. Optionally, the scanner can be connected to an external monitor via HDMI. However, this only offers the advantage of a larger preview than on the scanner display itself.
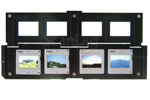
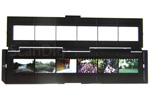
Before scanning, make sure that the backlight inside the scanner is clean. To do this, use the cleaning brush supplied. To do this, the side with velvet must be inserted downwards into the scanner and moved back and forth. Now the scanner is prepared and the film holders can be loaded. Depending on the format, the film holders offer space for a medium format, up to 4 framed KB slides or a 6 KB strip. The 35mm film strip holder has 2 elevations per frame that are designed to grip into the perforation to hold the film. This did not always work well with our test films, as the perforation of the film should not show any damage and the film transport of the camera must have worked perfectly. This also makes it difficult to insert several single frames or several shorter film strips.
Each film holder has a small arrow indicating the direction of insertion into the scanner. There are also arrows above the slots on the scanner that clearly indicate the insertion direction. The film holder is now pushed into the scanner. The upper slot is for the two KB holders, and the MF holder goes in the lower slot. Depending on whether you are scanning MF (120) or KB (135), you still have to move the focus switch above the slots.
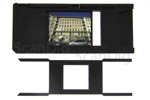
First, the film type is entered on the scanner. Pressing the OK/Enter key takes you to the submenu where you can choose between negative strips, slides and B&W films. Use the arrow keys Left and Right to select the format and confirm with OK/Enter. Finally, for KB you can choose between 126KPK (Instamatic) and 135 (35mm) and for medium format between 127VPK (4x4 Rollfim) or 120 (medium format in the versions 60x45, 60x60, 60x70, 60x80 or 60x90). With OK/Enter you confirm the selection again.
The scanner display shows the preview of the image in real time.You can position the film holder optimally again, because a little play room remains even after it has snapped into place. Press OK/Enter to access the settings menu for exposure compensation (EV), colour (R,G,B) and sharpness (SHP). If you do not want to make any optimisations, press Convert/Mode directly instead and confirm the saving with OK/Enter. 2 seconds later the JPG is saved on the SD card and the next image can be scanned. The scanning process itself therefore only requires 2 keystrokes.
To transfer the scanned files to the PC, the scanner can be connected to the PC via USB cable. For this variant, you switch on the scanner after connecting the cable and select USB MSDC in the menu using the arrow keys. Confirm the selection with OK/Enter and the SD card can be accessed via the PC. Alternatively, the SD card can also be read in with a card reader or card reader slot.
The images are stored on the SD card in an order and numbered from IMG00001 upwards. The numbering cannot be changed and cannot be reset by formatting the SD card.
The film holders for the x66-Scan are separately available. With a second slide holder or film strip holder you can load it while the first one is inside the scannner. Additionally to the standard film holders there is an optional instamatic film holder for the x66-scan. In our online shop film holders for the reflecta x66-scan are available.
The image quality of the reflecta x66-Scan
The manufacturer states an optical resolution of 14 megapixels. Our USAF target was also saved with the necessary 4584x3056 pixels, so our scan contains 14 megapixels. With the help of the USAF target, we can determine what effective resolution the scanner actually provides.
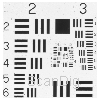
We have already described at the beginning that the reflecta x66-Scan can only output in compressed JPG format. The JPG format is not optimal for evaluating the effective resolution, but the resolution test also reflects it in this way, as it is generally not possible to scan in any other format. In the scanned USAF test chart, the horizontal and vertical lines of element 5.2 can just be distinguished. According to our Resolution table this means an effective resolution of about 1825 ppi. If you scan a 24x36 mm image with 1825 ppi you get a file with 1733 x 2591 pixels. This corresponds to approx. 4.5 megapixels. Compared to the advertised resolution of 14 megapixels, this means that the reflecta x66 scan delivers just under 32% of the nominal resolution for a KB slide or negative. Compared to other film scanners, the reflecta x66-Scan can at least keep up with the resolution of a flatbed scanner like the Epson V600. So what dose the 1733 x 2591 pixels mean for a printout? If we assume a print resolution of 300 dpi, a picture containing 1733x2591 pixels can be printed in the size of 14.6 x 21.9 cm. For viewing on a Full HD TV, which requires an HD resolution of 1920 Ũ 1080 pixels, the achieved resolution is also completely sufficient.
The Reflecta x66-Scan delivers an effective resolution of approx. 1800 ppi and thus produces image files with effectively approx. 4.5 million pixels. The nominal value is 14 megapixels.
So the Reflecta x66-Scan actually produces image files that contain 14 megapixels (or 22 megapixels interpolated). Effectively, however, it only contains image information in the order of 4.5 megapixels. But this is quite enough to view the digital images on screen, to use them in social media or to create a digital photo album. For permanent archiving of film material, however, 4.5 megapixels is to low, especially for medium formats. However, with an effective resolution of 1825 ppi, the Reflecta x66-Scan is almost twice as good as its predecessor Reflecta X120-Scan.
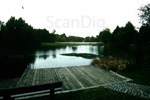

It is not only the resolution that determines the quality of a scan but also, for example, the contrast range. Here it quickly became clear during our test scans that the reflecta x66-Scan quickly reaches its limits with images that have strong contrasts. Especially in dark areas, there is quickly no more drawing. In our tests, for example, the automatic exposure simply turned shadows deep black. Also the manual exposure, which is adjustable between -2.0EV and +2.0EV in 0.5 steps, was only of limited help to increase the image quality significantly.
The low contrast range of the x66 scan is always noticeable when there are very dark or very light areas on the image or when there are both very dark and very light areas on an image. If you scan a normal holiday photo or a family picture with the Reflecta x66Scan, you will get an acceptable scan because the contrast range does not play a major role.
The scanning speed of the Reflecta x66-Scan
Actually, one should not speak of scanning speed with the x66 scan, because a film is not scanned in the classical sense, i.e. scanned, but simply photographed. There are no times like with a scanner but rather like with a digital camera. For example, it is not possible to specify a preview time at all, as the preview takes place in live mode. So you always see exactly that what the sensor is looking at. Slightly moving an inserted film holder back and forth results in a live change of the preview image.
Reflecta states the scan time for an image as less than 2 seconds. We can confirm this value; the scan time is therefore not important in practice. It is also not so much the time that the scanner or camera needs to take the picture, because the actual exposure takes place in a fraction of a second, as is well known, but rather the time of the subsequent image processing and image storage on the memory card.
So when scanning images with the Reflecta x66-Scan, there is no waiting time during a preview scan or a fine scan, which is common with film scanners. Most of the time is spent loading the films into the film holders and positioning them precisely in the scanner.
Summary, Conclusion
The reflecta x66-Scan is a true all-rounder: from 35mm film strips to mounted 35mm slides to Instamatic films, it can process almost anything in this size range up to medium format 6x9cm. Since it runs PC-independently, you don't need to worry about software versions and system requirements. The image quality is perfectly adequate for standard images if you want to view the scans on screen or post them on social media. However, the unit does not extract enough image information from the films for permanent archiving.
Back to the film scanner tests index
|