 |
NikonScan Scan-Software for Nikon-Film Scanners
In the year 2009, Nikon has stopped producing film scanners. This is also the reason why there are no further updates for the NikonScan-software to expect. Apparently, NikonScan will not run anymore on the future operating systems of Windows Apple. As an alternative, the SilverFast Scan-Software is available that is permanently further developed, also for those scanner models that already disappeared from the market some decades ago. More detailed information about SilverFast is available in our SilverFast FAQ-Side.
Nikon releases its film scanners with the in-house software NikonScan, that is identical in all devices and automatically adapts to the possibilities of the device or the different film feeders or film adapters. It represents a quite high-capacity tool to enable a comfortable scanner handling. Moreover, the programe also offers some comprehensive possibilities for the image processing and the optimization already available during the scanning. A very visibly arranged handling guidance on the screen deceives at first the multifaceted features that are available in the background, in the pre-adjustments and the so-called pallet windows.
Principally, the handling takes place intuitively, but in order to make use of all possibilities, the demanding user will not avoid to read one of the two manuals available in several languages (in the European market: German, English, Dutch, French, Italian, Spanish) .While the beginner will find the most important basics in the book, the advanced user can get introduced into any detail by using the electronic possibility offered that is the reference manual on CD.
Installation of the NikonScan Software
The scope of delivery of every Nikon-scanner includes the programe CD, which installation is accomplished by the auto start and the usual menu guidance on the PC's screen and also in MAC is easily done (German, English, French, Spanish). After the insertion of the CD, the almost usual autostart takes place that first guides to the language selection and after having chosen it, it offers the " simple installation". Without the autostart function, one chooses manually the overview of the files contained in the CD and clicks on "Welcome., exe". Now, the license agreement has to be confirmed with an "ok" and then the fast installation of NikonScan already starts.
After some few mouse-clicks, the file path, the scanner model and the colour space with which it has to be worked, are determined. At the end of the installation, a restart is recommended and/or automatically done. Currently, the versions 4.0.2 are installed either for Windows (from Windows 98) as also for Mac Os (OS 9.1 and 9.2 as also OS X from 10.1.5), in case of Windows Vista, the version 4.0.3 is installed automatically. In addition to the still manegeable handling instruction book, Nikon delivers with all scanners the reference manual in several languages (German, English, French, Italian, Spanish, Dutch, Chinese, Japanese) on an additional CD, which installation also works intuitively and is accomplished within some minutes by following the automatic menu guidance .
The User Interface of NikonScan
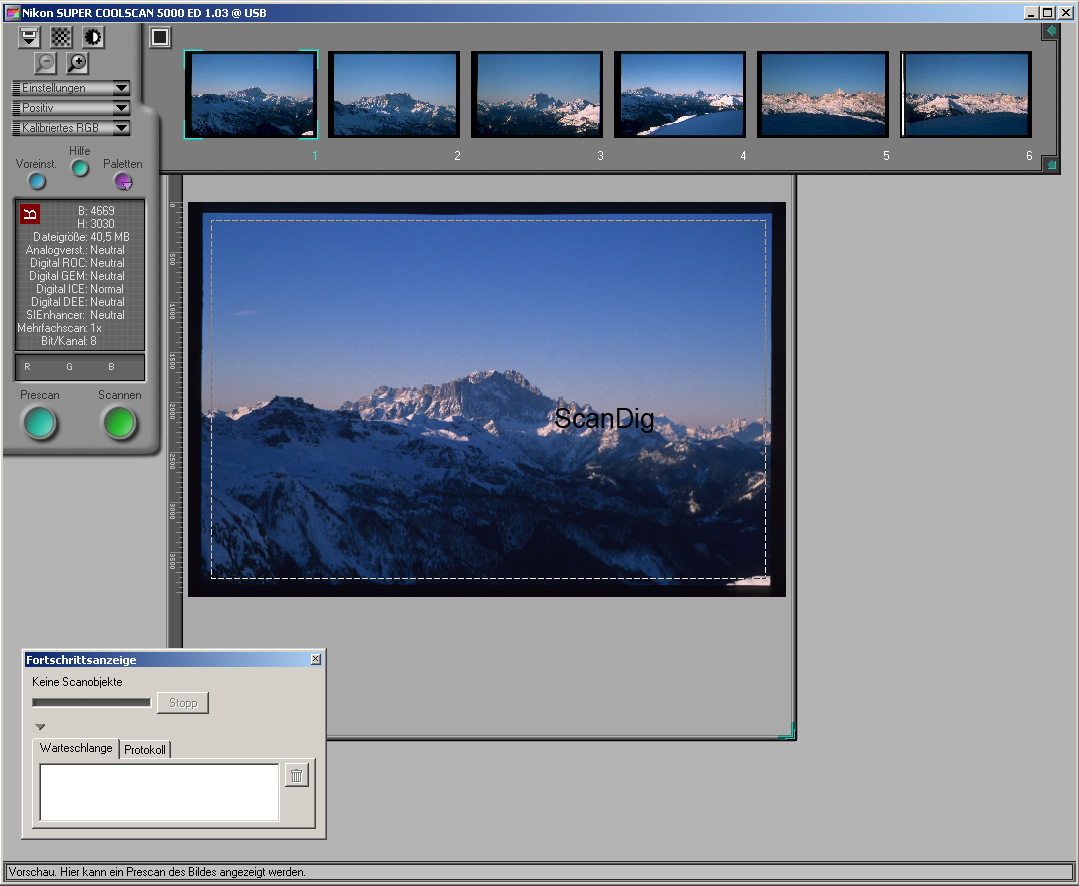
With its scan programe NikonScan, Nikon focuses primarily on manageability and an easy handling. If a scanner is connected and on, the software automatically recognizes the type of the scanner as also the different feeders, orifices or film dapters. During the start of the software, the device is shown in the scanning window at the left upper side. The scanning window is divided into a few but essential subdivisions. In order to start the programe, a double click on the NikonScan-symbol is enough, of course, provided the scanner is already switched on.
The first appearing main window is more or less rather the background window that does not have any significance, except some basic settings that can also be made later on and/or in the soon appearing task window. But the scanner-symbol holds an essential exception, as it helps to be able to open the task window at all, to recognize the connected scanner and to make all command and task windows visible at all. Also after a successful scan or scan job (for example in the case of several scans at once: after the last image )or a scanning error, the scanner can be reactivated over this symbol. Provided the aforementioned, we come now to the actual user interface (task window), that we will present in the following text.
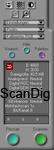
The Option Window
On the left side at the top, there is the option window where some basic functions are stored. It is about the following points:
- Reject/Loading button for the feeding, reject or change (for the automatic of the feeder SF-210) of the film material
- Autofocus-button that assures the manual sharpening on a previously chosen operating point
- Gauge head for exposition for the automatic measurement of the exposition for the image analysis and the maximum exposition result
- Zoom compensator for the in- and out zooming of the preview area
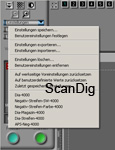
- Adjustment button as a storage of a preset menu and/or for the resetting to the standard presettings
- Selection bar for the selection of the sort of film, positive, negative (colour), negative (black/white) or kodachrome
- Adjustment bar for the selection of the different colour modi
- Pallet option that by clicking on it offers a significant variety of options as for example selection of resolution,gradation correction, etc.
- Help button that activates the help function of NikonScan
- Preset-button that offers a lot of possible presets as for example the kind of colour space, memory location or the basic adjustments for the prescan and the scan
The Information Window
In the left middle field, there is the so-called information window that shows the most important data of adjustment.
Therein, the following information is included:
- The symbol "R" that indicates with its position in the field whether some rotations or reflections have to be accomplished in the image shown in the preview area compared to the original alignment of the film in the scanner
- Image size (Width/Height) in pixels
- File size in MB
Moreover, the Status and Activity Indixes for:
- Analogue gain
- Digital ROC (colour resauration)
- Digital GEM (film grain equalization)
- Digital ICE (automatic dust and scratch correction)
- Digital DEE (improvement of the detail drawing in over- or under exposed image areas)
- SIEnhancer (automatic correction of brightness, contrast and colour)
- Multiple scan
- Colour depth adjustment in bit/channel
- Current colour value display of the mouse pointer on the preview image in RGB
Straight thereunder there are both pushbuttons for prescan and scan.
The Preview Area
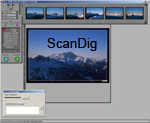
The main part of the user interface of NikonScan is taken by the preview window that after the pre-scan permits the first view to the image to be scanned. Apart from the actual scanning area which size can be reduced either vertically or horizontally by a flexible frame, the window offers some rulers adapted to the display either at the left as also at the upper edge in pixels, centimetres, millimetres, inches, pica and dots. Moreover, it is possible to switch over a rider between "original" and "processed", which means that the original pre-scan with the pre-scan data is comparable with the image adjustments made in the pallet windows (more of that later ).
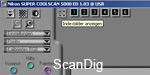
Between the option window and the pre-view window there is a small horizontal bar inconspicuously located that brings the image index display to the foreground if one points with the mouse on it. Depending on the scanner, film adapter or film quality, (e.g. film strips, APS-film, original material of medium format), by clicking on this bar, the image index display appears showing the possible number of images that are possible to scan in this modus. Another small pushbutton appears that helps to handle an index scan of all images contained in a film adapter or in a film strip. This button serves to revise some eventual misalignments of the image edges or cuts, but also to scan away in the batch modus all displayed images one by one.
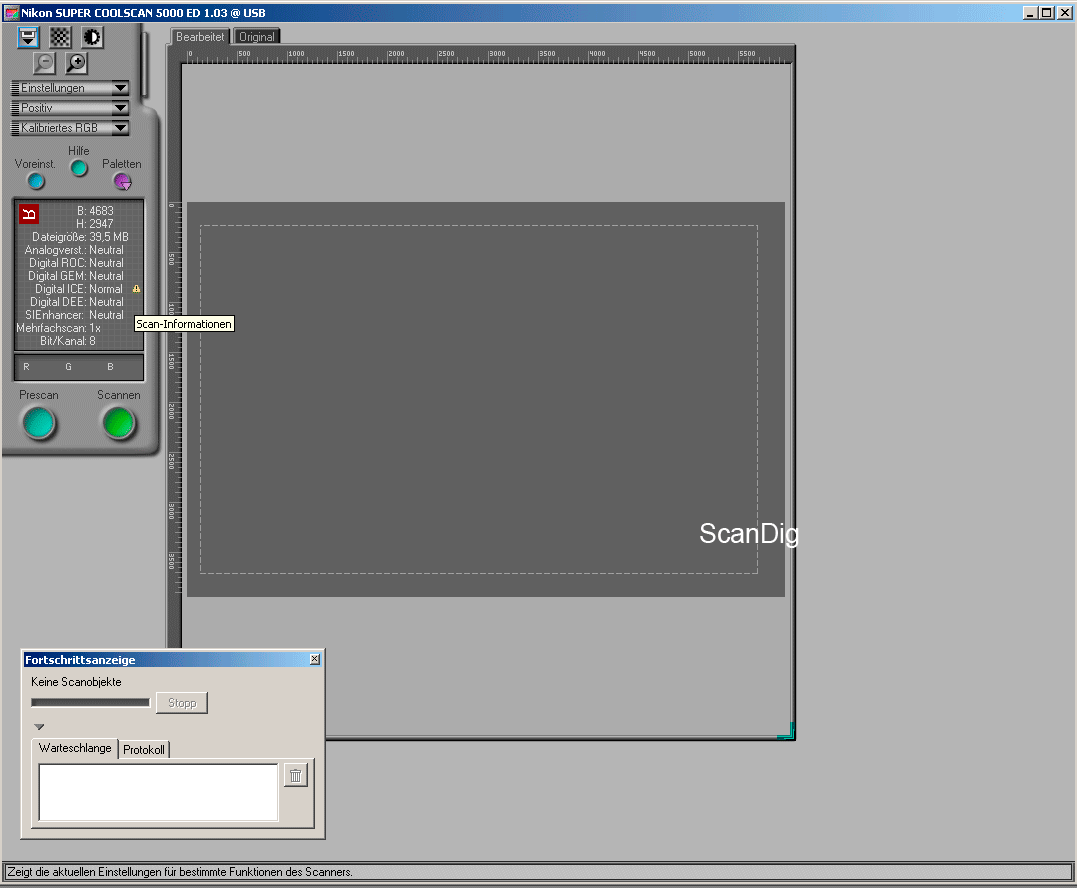
The Scan Status Window
A bargraph located at the upper area of the window shows if the scanner and how far the scanning processing is in progress, in the field underneath the scans that are still to be done are listed. By changing to the rider protocol, the jobs of the scan that are already accomplished are listed. The stop-button serves for interrupting all scanning procedures.
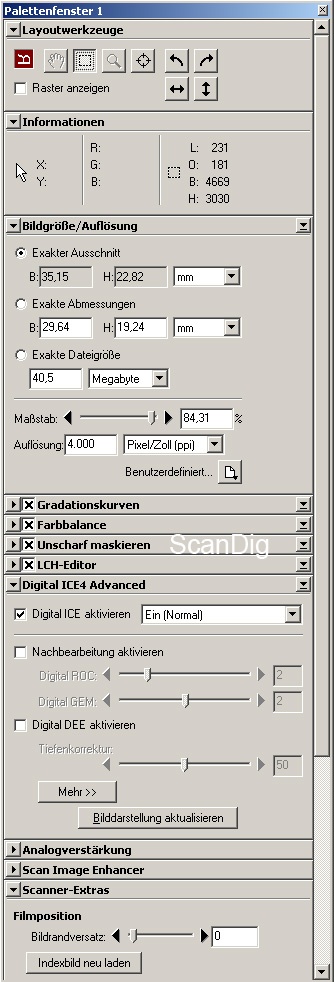
The Pallet Window
Once the basic pre-settings are done (more about this later on), the main task window pallets represents the apparently most important and comprehensive supportive appliance for the scanning and therewith an image quality that is already optimizable during the scanning. It is accessible over the round and pink coloured pallet button of the option field at the upper left side. It offers in total 11 main push buttons that, by clicking on the individual riders,make appear the individual submenus with their different possibilities of adjustment. These are as follows:
- Layout tools: with them, the image cutout to be scanned can be rotated and reflected, a new autofocus point can be determined or also the size of representation as also the visible image cutout can be determined.
- Information: the size of the actual image is shown in pixles and also the RGB values of the scan are shown.
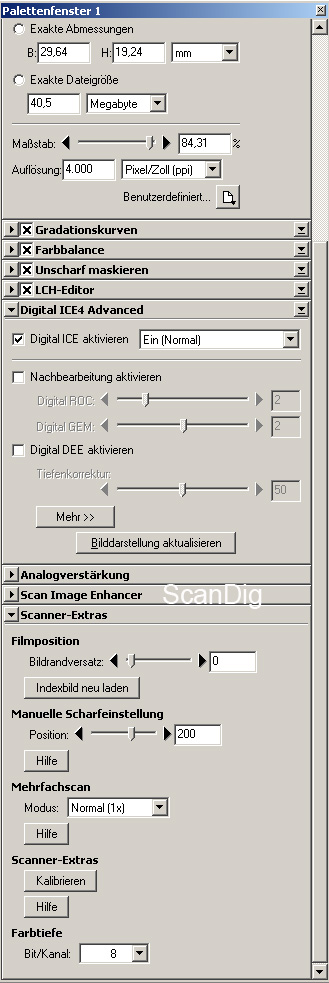
- Image size/resolution: offers the possibility to determine the image size and display resolution per "Exact Cutout", "Exact Dimension" or "Exact File Size".
- Gradation curves: brightness, contrast and colour balance can be determined in certain areas of the tonal value.
- Colour balance: permits modifications in the brightness, contrast and colour balance all over the area of the tonal value.
- Unsharp masking: with this tool it is possible to modify the impression of sharpness by the digital high definition over a slider, specially at the outlines.
- LCH-Editor: manual colour shift, modification of the saturation as also modifications of brightness and contrast in certain zones of the tonal value
- Digital ICE4 Advanced: dust and scratch correction, image restautration of desaturated colours, film grain equalization and improvement of the detail drawing of over- and underexposed image areas
- Analogue gain: modification of the exposure values of the scanning lamp
- Scan Image Enhancer: automatic correction of brightness, contrast and colour
- Scanner-Extras: manual adjustment of the misalignment of the film strips and sharpness as also the option of multiple scanning, colour depth and calibration of the scanner
The Possibilities for the Pre Scan
beside the help- and pallet button at the left, there is the blue button for the pre-settings, with which some comprehensive basic scanner adjustments can be done. After the appearing of the window, one has the possibilities to modify or adjust in the following menu the values and basic corrections:
- Gamma
- Colour Management
- Memory Location of Files
- Individual Scan
- Batch Scan
- File Storage
- Automatic Actions
- Colour Adjustments
- Prescan-adjustments
- Grid Adjustments
Working with the Software NikonScan
Those who got frightened after having read all the possibilities and the technical terms can calm down. After a short time, even the beginners can achieve some scans of considerable quality. In the course of the time, the demand will of course increase and also the professional user will handle the technichal possibilities differently and with a different background knowledge that the software all-integratingly offers.
In order to be able to start, actually only a few things are needed. On one side, the selection of the film sort is of course decisive, on the other side, the respective adapters or feeders. Generally, it can be said that the automatic dust and scratch correction can and should be always used (except in case of black/white negatives due to technical reasons). Anyway, some "playing and trying" is advisable in order to get introduced into the software. Nobody would scan a complete archive "just like that", without having done previously some pretests that, with different adjustments, absolutely lead to different, thus better or worse results.
Let's take two case studies with the small picture scanner Nikon Super Coolscan5000 ED:
Normally, the factory settings from NikonScan, that are findable among the presettings, are already adjusted in a user-friendly way, thus for the beginning, it is enough to check the points individual scan, batch scan and the prescan-settings that is provided with all required check marks but can be later on modified according to one's gusto.
Scanning Slides in the Batch Modus with the Slide Feeder SF-210
We have successfully installed the software and want to scan several 35mm slides in the batch modus with the help of the automatic slide feeder (SF-210, not included in the scope of delivery of the scanner - optional accessoire).Therefore, we presuppose that the slides are normally exposed and in good condition.
Nikonscan is started with an online scanner that is already recognized by the operating system, then the main window appears. We get to the task window by clicking on the scanner symbol. There are already several slides in the feeder and the first slide is already begging for a prescan. Therefore, the only thing to do is to press the prescan button; the slide is then automatically absorbed and the prescan is accomplished. All special adjustments for the later fine scan only need to be done afterwards. Only in the option window, the film type positive should be already adjusted (for Kodachrome-slides, Kodachrome should be chosen). The prescan is quickly ready and one is able to see the preview image of the first slide in the preview window.
First, its side correctness has to be evaluated. In order to be able to make some further adjustments as for example for the resolution and dust and scratch correction, the pallet window has to be opened now. The first pallet with the layout tools enables to rotate or reflect the image in order to get it true sided, whereat the position of the letter "R" gives notice.
Now, an image cutout is normally determined (pallet three should be opened now and the option "exact cutout" should be activated), by drawing on a frame that is either modifiable in horizontal as also in vertical direction or movable as a whole with the mouse pointer. The frame can be also drawn on to such an extent that the slide is scanned uncut, thus with a black frame all around. (The frame size can of course be determined without drawing on, thus per "Exact Dimension" or per "Exact File Size". But then, there is to consider that therewith, the resolution and/or the reproduction scale changes).
Once the frame is chosen, the desired resolution is determined (e.g. 4000 dpi) and after that, normally, the ICE-function is set on "normal" on pallet eight. The GEM and ROC (film grain equalizer and colour restauration) are normally not necessary in case of a good quality slide material. Now the last pallet ("Scanner-Extras") has an effect, in which the scan modus ("Normal" or "Multiple Scan"), the colour depth and the number of images are adjusted, whereby it is absolutely beneficial to put in the maximum possible number of "99" in order not to have to count the slides before.
The pallets 2 (Information), 4 (Gradation Curves), 5 (Colour Balance), 6 (Unsharp Masking), 7 (LCH-Editor) 9 (Analogue Gain) and 10 (Scan Image Enhancer) are not really necessary at the beginning, serve as a "playground" for the perfecting and are normally applied when the users are connoisseurs and professionals with advanced knowledge, whereby the professional user with the respective image processing programe in the background (e.g. Adobe® Photoshop®) rather reworks a preferably neutral scan instead of engaging in a change of the image data already during the scan.
Again, the very last revisions are applied to the sort of film (in our case "positive") as also the colour modus (here: "Calibrated RGB") in the option field. All these adjustments just done can be saved under "Adjustments" in the option field. In the option "save adjustments", a name is given to this adjustment which is determined in the now following scan job as "Determine User Settings". Now, the scanner is ready for the batch scanning.
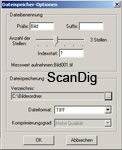
As soon as one presses the green "scan-button", another window appears with the data file storage options, in which it is determined how the denomination and the numeration of the image file should look like. Moreover, the file where it has to saved is determined, as also the file format (BMP, JPEG, TIFF, TIFF (to convert in CMYK) or NEF (an own Nikon format that can only be processed as a kind of "raw-file" only with "Nikon-Scan" or "Nikon-View"). One click on "OK" starts the individual and/or the batch scan, depending on the number of slides and/or the number of images adjusted in the pallet window 11.
Scanning Negative Strips with the Automatic Film Strip Feeder
Now we have an archive sheet on which there is a complete film in form of some individual colour-negative-strips (mostly 4-6 images on one strip). Thus, we equip our scanner with the film feeder (SA-21, included in the scope of delivery of the Nikon SuperCoolscan5000ED) and start the programe. The first film strip is introduced and the scanner absorbs the strip automatically. What is to be considered is that one individual negative cannot be absorbed as it is much too short for that. Moreover, also the film strips exceeding 6 images cannot be fed (for longer film strips, the optional special feeder SA-30 applies). Those slide strips of suitable length can be of course fed and scanned.
The type of film material in use is a thing the programe cannot know. This is why we put "negative (colour)" in the option window. But contrary to the framed slide, our next step is not to click on the "prescan"-button, but we make use of the small bar between the option window and the preview window that brings out the index display of images. The programe already knows which feeder of the scanner is used and aligns the index display accordingly. One click on the appearing start symbol is enough and the scanner accomplishes an index scan of all images contained in the strip that is displayed within some few seconds. In the index scan it is already visible whether the side correctness is given. Normally, the first image is marked with a green frame, but we can mark all images on demand by pressing the shift key and the mouse and adjust all images to the right position at the same time with the pallet 1 (Layout tools). Now, we mark again only one image (normally the first one) and issue the prescan per mouseclick on the turquoise prescan-button.
After the prescan we draw on our frame of choice (e.g. cut, uncut - "Exact Cutout") and determine the image size in the pallet 3 per dpi, "Exact Image size" or "Exact Dimension". We continue with the pallet 8, with which we enjoy to be helped by the excellent ICE-function (dust and scratch correction, selection: "normal"). Due to the almost stronger visible film grain on the negatives we also adjust a small film grain equalization (GEM) to the stage 1 or 2. A colour restauration (ROC) is not needed in the case of a good basic material and should be tried on demand by a test line before a larger amount of material is processed with the same adjustments.
As the scanner has recognized the film strip feeder, the software offers us now an indispensable extra for the treatment of the film strips that is the possibility of correcting the image positioning given in the pallet 11. Although the scanner has an automatic recognition of the bars between the images that is nomally good working, sometimes, it is necessary to mark some individual images in the index scan and bring the to the right position with the image positioning tool (slider). Now, all important adjustments in the pallets are done and we can now concentrate again on our prescan and the last preparations for the scan.
Now the side correctness is given, the basic adjustments of the pallets done, the cutout is determined and, on demand, we already made a correction of the image positioning. What is still missing is to save this setting for all negatives. Therefore, we mark the image from the prescanned index images, go to adjustments → save adjustments and give a name to this adjustment. Now we mark all index images and click in the setting menu on the name that we have just assigned. Now we mark again the first image of the image index and click the adjustment item "Determine user Settings". Therewith, the adjustment applies to the whole negative strip and all following ones.
Now we mark again all index images, press the green scan-button and make all the necessary adjustments for the memory location, file name, file format. By clicking "OK", the scan of all images that are in he strip begins.
Disadvantages/Weaknesses of the NikonScan Scanner-Software
Contrary to some other scanners, Nikon delivers its film scanners with a very good scan software. But also Nikon-Scan has some weaknesses and disadvantages that sometimes are annoying but for some users some real knock-out critera. For example, the fact that during the scanning of 35mm framed slides in the batch modus with the automatic slide feeder SF-210, it is only possible to determine a maximum of 99 images to be scanned can be considered as a weakness. If one scans a CS magazine 100 slides or a universal magazine with 2 x 50 slides in the batch modus and is lucky that the scanner does not pause in between, after 99 images, the scanner stops working and for the image no. 100, a restart of the scanner is required. This is very annoying and an absolutely needless limitation, but Nikon never changed it in all those years.
Unfortunately, the indispensable function for the correction of the misalignment of the film strip does not work any more. There are many times when a misalignment of the film strips has to be corrected but then one hits upon the end of the correction bar. In the case of the big Nikon Super Coolscan 9000, this function is not available at all with some film adapters.
But the biggest disadvantage of the NikonScan software is that with it, no scanner calibration is accomplishable. But the Nikon film scanners are professional devices that most of the users want to profile professionally. A good scan software would accomplish a calibration with the help of an IT-8 Target and consider the correction profile automatically with each scan. Unfortunately, this is not possible with NikonScan, even though one purchases a separate IT-8 target.
As good as NikonScan might be, the missing possibility of calibration causes most of the Nikon film scanners are not operated with NikonScan but with SilverFast Ai. In the scope of delivery, SilverFast Ai includes an IT-8 Target and accomplishes the image correction automatically by means of the ICC-colour profile. Up to the fourth generation of the Nikon-scanners, SilverFast was still included in the standard scope of delivery. Not earlier than from the 5th generation, (Nikon LS-50, LS-5000, LS-9000), only NikonScan was attached to the scanners as a scan software, so that SilverFast had to be purchased separately.
Resume, Conclusion
The scan software NikonScan that is included in the scope of delivery of all Nikon-scanners is a very efficient scan-sofware that is designed in accordance to the different Nikon scanners and that automatically adapts to all deliverable film feeders, film holders or film adapters. Thus, as a scanner software, NikonScan is very laudable. But unfortunately,it is not possible to accomplish an IT-8 calibration with Nikonscan, so that most of the owners of a Nikon-scanner accomplish their scans with the professional scan software SilverFast.
More information, tips and recommendations concerning NikonScan are readable in our FAQ-side about Nikon Scanners.
Back to the index software tests
|
 |
)
)
)
)
)