Screen calibration for securing color fidelity
One of the most important procedures is a monitor calibration when it comes to image editing, watching and processing of digital images and of course for scanning reflective samples and film material. While big printing shops, agencies and pulishers have specialists for colour management and monitor calibration most people and photographers have never used more than pushing the "auto calibration button" or the "brightness/contrast buttons" at their home monitors.
Such simple calibrations which should be named "approximate adjustments" often provide the apparently best possible results but that has nothing to do with a correct representation of original colours on the monitor. And the final printer or photographic laboratory output is not necessarily what it was when shown at the monitor.
This website applies itself in detail to the subject of monitor calibration. It is very important for us to show unexperienced newcomers in the field of digital photography, scanning and image editing the significance of monitor calibration.
Typical cases of a missing monitor calibration
I want to start this subject with a typical user problem which always occurs periodically. Since we digitalize a lot of photos for our customers in line with our Scan-Service and also deliver many scanners sold in our Filmscanner-Shop we get a lot of feedback of problems related to a missing monitor calibration. Here some real-life examples:
A customer complains that our scans from his photos are much too dark. But if we look at our monitors the colours are bright enough and look natural. A simple correction of the customers monitor brightness solves this problem and the colours are now displayed correctly. However, the dull adjustment of the monitor was not arbitrary because for those who work with office documents tend to turn down the monitor brightness. We also have experienced a case in which the customers monitor was simply too old in order to display the colours in sufficient brightness. When the images were watched at a friends PC they looked like a dream.
One customer noticed a distinct red cast in all his images. A wrong adjustment in the scan software? No, he was using a two year old monitor which red channel was adjusted too strongly. Unfortunately this monitor did not has the option for a separate colour channel regulation. Only solution: a monitor exchange or a calibration software which detects and compensates the wrong performance of the monitor.
Customers who buy an own film scanner tend to compensate effects which are caused by external circumstances. Then there are customers who set the gradation curve mercilessly down (lowering the brightness values) only because the rays of sunlight shines indirectly at the screen. When printed out the corresponding image of the Eiffel Tower taken at lunchtime appears in half-light.
Even worse, if scans or images from camera are edited in that way that they look right and good at the uncalibrated monitor. If watched at another one the images suddenly appear to be brighter, too dull or have a colour fault. In that case you did not optimize the image but incorporated the "not-realised-monitor-calibration" in your picture which often results in a very effective and complete image destruction.
Then many customers complain that a digital image service only delivers images with wrong colours. There the opionions differ in a wide range. While one raves about his digital photos another one swears never to use a the scan service XY again. No question there are image services who do not adjust there machines correctly, but numerous wrong prints are caused by optimizing an image for a special screen which look catastrophic if watched at a calibrated one.
The list of real-life examples can be continued endlessly. Of course there are scanners and digital cameras who make images with colour faults but before making such a statement you should alsways check your own monitor. A lot of problems of newcomers in digital imaging result from wrong monitor adjustments. This problem however can be easily solved with the appropriate utilities and some knowhow seen in the following chapters.
Numerous problems from newcomers in the field of digital imaging are caused by a inaccurate monitor calibration. A well calibrated monitor is a precondition for quality scans, digital images, good image editing and prints.
How does a monitor-calibration-tool work?
Many users consider that they can adjust theyr monitor perfectly by comparing some photo samples with the digital versions on the monitor and regulating the colour monitor sliders in the way that they look equally. This procedure might work in some degree but with this method there is no calibration with an objective measurement possible. The human eye is unable to distinguish between minimal adjustments of the colour channels on monitors. If you adjust your screen for an optimal result of displaying a beach image other images taken in half-light could be displayed too dull.
There are test pictures that display selective single colours. However with that kind of pictures an exact calibration is not possible either. You need an objective method to check the displayed colours on the monitor. For that there is an utility necessary called colorimeter. A colorimter is able to measure colours. But that is still not enough. You will also need a colour reference for the measured colour and a software which adjusts the colours. There are several of those toolkits on the market. How these toolkits work will be described in the following.
Step 1: These kind of calibration tools always advise to set the monitor settings back to the manufacturers state. For example a monitor whose brightness slider is nearly at maximum is not capable of giving room for correct colour adjustments.
Step 2: There is no general usable standard adjustment which allows to calibrate all monitors of the world. Two factors determine the degree of calibration: the colour temperature and the gamma value. The colour temmerature determines the warmth-impression of an image (the water of a river can seem warm or cold) and the gamma value determines the brightness of the middle gray tones. There are quasi-standards: colour temperature = 6500K and gamma value = 2.2. In professional photography and image editing there is also often used a colour temperature of 5000K. Simple calibration tools work with those values. Even better tools enable the user to choose from different parameters. Professional tools are capable of working with any user value input desired.
Step 3: Some very good monitors have the option to adjust the colour temperature or the intensity of the colour channels (red, green and blue) directly in the screen menu. With some calibration softwares you can fine adjust those settings in order to get the most colour yield.
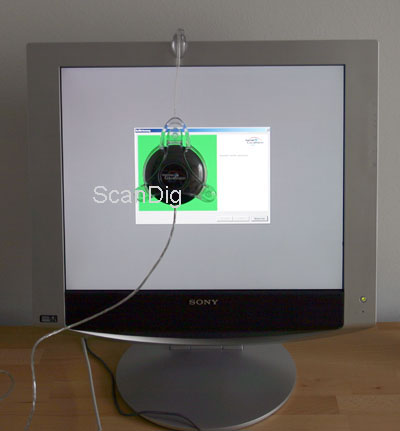
Step 4: Now comes the characteristic colour calibration part: A colorimeter is positioned on the screen surface. The corresponding software displays numerous colour tones in a window, for example a colour series of deep blue to white, a gray tone series of black to white and many more colour combinations.
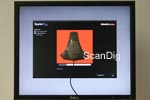
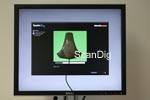
The colorimter measures the displayed colours and sends the results back to the software. In order to do so the tool has to be connected to the PC with a USB cable. Then the software is capable of comparing the measured colour tone with the displayed one and can determine the difference. For instance the software displays a gray area with 50% black but the colorimter only measures a gray tone with 45% black. Then the software knows that colours with 50% black has to be displayed 5% higher in order to appear correctly at the monitor.
Step 5: At the end of the measurement series the calibration software has determined a lot of differences between displayed and measured colour tones. This result is saved in an ICC-profile. It is an individual colour profile for the measured monitor. This profile is going to be loaded in the graphics card at the start of the operating system and with this procedure the monitor is calibrated. That means that the monitor now displays the brightness, contrast, colour temperature, etc. according to the desired adjustments that were made.
Nevertheless with that there is still no colour fidelity guaranteed. This happens with colour management capable software like for example Adobe® Photoshop®. Those programs analyze the ICC-profile and make the necssary corrections so that monitor colours are displayed true to original. A simple web browser is not capable of using colour management so he does not readout the ICC-profile.
The display of correct colours happens in two main steps: A first common calibration step and in a second profiling step. All application softwares benefit from the calibration including the web browser or simple image viewers. But only colour management capable programs like Photoshop® benefit from profiling.
The colour profile made by the calibration software and the colorimeter provides a correct display of colour tones at the screen according to specified values for colour temperature and gamma value.
A calibration process like described above is done in half an hour but should be repeated frequently for instance once a month. Professional users in image agencies and graphic art offices calibrate their monitors to some extent weekly. Very imprtant is the fact that the monitor buttons and sliders should not be modified once the calibration is done. For example if the screen menu is adjusted for DVD playback you will have to calibrate the monitor for the normal mode again afterwards.
Advantages and boundaries of monitor calibration
So what are the advantages of calibrating his own monitor to standard values? Are all imaginable colour problems solved now? Are high quality prints from the inkjet printer guaranteed? Does the scanner provide better results than before?
Well, the typical problem that a series of digital photos looks different at the friends monitor than at the own is solved when both screens are calibrated to standard colour values. Also the ones who got more monitors can assure that images look the same on all his monitors. If you buy yourself a new monitor then you can also be assured that after a correct monitor calibration your images look the same than before on your screen.
The very big advantage of a colour calibration is during scanning or processing digital photos because you can be sure that the correct colours are displayed at the screen. If the colours do not look like desired you can make adjustments in the scanner or image editing software accordingly knowing that you are correcting the actual image and not editing the wrong monitor adjustments into the picture so as to destroying it.
A correct calibrated monitor is the basic requirement for scanning photos and for editing images.
What are the boundaries of monitor calibration? Current monitors let themselves calibrate at specific colour temperatures/gamma values with no problems. But some users have their 10 year old CRT displays working. There are products that display perfect images even if they are very old but there are also ones that are not able to display correct brightness or colours anymore. In those cases a colour calibration does not help very much. It could provide a little improvement but a correct display of colours on the basis of the entered values is not guaranteed.
Can you be sure that you get perfect prints from your printer or digital picture service if you have calibrated your monitor? NO!!! That are two absolute different matters. The monitor calibration ensures that the colours of an image are displayed correctly at the screen. A connected inkjet printer benefits from this because the user did not mess up the colours in the scan software or image editing software. But if a printer outputs a picture correctly depends on his quality.
And you might be already guessing: There are also calibration toolkits for printer (take a look at our page printer profiling) which work analogue to monitor calibration toolkits: A sample print with standard colours is being made, the actual colours are determined with a measurement instrument and with assistance of a software is an individual printer profile generated. However you can expect high quality pictures from such services when you have a calibrated monitor and the digital picture service has calibrated machines.
A further limitation of the monitor calibration is the two step process calibration - profiling: From the common calibration every programs benefits which generate outputs on the screen. But only colour management capable software which analyze ICC-profiles benefit from profiling. That are nearly every image editing softwares but no web browsers. That is why an image in Photoshop® can appear very differently than in a webbrowser.
How often should a monitor calibration being made?
Have you solved every colour problems of the world when bought a monitor calibration tool and done the 30 minutes long procedure successfully? Can you sell the colorimeter shortly after the successful calibration? The answer is a clear NO. Some reasons in detail:
Every computer monitor has colour fluctuations which vary from day to day or in addition to this even within a period of month or years. A monitor which is today calibrated 100% correctly could display colours only 98% exact at the next day. This fact does not annoy amateurs very much because external effects like the actual light condition have a bigger impact at the screen than the colour fluctuation. Professional graphic artists working under standard light conditions are calibrating their monitors at a daily basis to avoid colour faults.
The amateur or semiprofessional user is annoyed by the long term colur changes of the monitor. Because of this it is advisable to repeat the calibration process every month. Of course, when a new monitor or PC was bought you also should do a new calibration. And often enough the adjustments on the monitor itself are accidentally changed so that they no longer match the colour profile and adjustments of the earlier made calibration.
The acquisition of a monitor calibration tool is worthwhile and not very expensive if you consider the fact of working with real true and unaltered monitor colours for years or even decades.
Calibration of TVs, projectors and iPad-Displays
Who once got accustomed to calibrated monitors with displaying accurate colours often wants to calibrate the other screens in his household. It is a pity when colours look brilliant and clear at the monitor but lack of those characteristics at the home TV screen or at a projector show with friends.
Calibration of TV screens
The calibration of TV screens is just as possible as the monitor calibration of PCs. You will need a special tool named Datacolor SpyderTV. It consists of a tool being also used for calibration computer screens and a special software DVD for the calibration process. Who already owns a Spyder-Tool for screen calibration can also buy the seperate software (Datacolor SpyderTV Upgrade) in order to calibrate his TV display additionally.
The advantage of a calibrated TV screen is the continuous display of correct colours at every calibrated screen. Also you enjoy watching your favourite films with the colours as the director intended to. Due to the fact that TV calibration is a popular subject we engaged ourselves in this matter in detail at our website about TV calibration.
Calibration of projectors
When giving speeches, presenting photo shows or being together watching films nowadays more often projectors are being which project a large-scale image at a screen. Projectors als well have the characteristic to differ in colour reproduction depending on model or manufacturer. Those differences can only be cleared with a colour calibration.
This can also be realised with the Datacolor Spyder-Tools. However when calibrating a projector you have to distinguish between projector-computer and projector-DBV/BlueRay-Player connections. In both cases you need a PC for calibrating. Though in the first case you save a colour profile on the PC, in the second case you are adjusting the colours directly with the aid of the projector colour menus.
To calibrate a projector which is connected to a computer you need the tool mentioned below Datacolor SpyderElite. With this colorimeter both one or more PCs and projectors can be calibrated. If you have done the projector calibration you will get the same correct and accurate image colours at your projector screen as at the computer screen.
To calibrate a projector connected to a DVD-Player or BlueRay-Player you need the tool Datacolor SpyderTV which we advised for tv calibrations above. In this case the calibration is made like the tv calibration. Detailed information about this can be found on our page TV calibration. After a successful calibration you can enjoy your DVD/BlueRay collection in the director-intended colour spectrum.
Calibration of iPad-Displays
In the second decade of the 21. century the great tablet pc era has started above all the Apple iPad with its different variants. More and more often those touch screen pcs are being used for presenting or simple video and photo viewing. It is clear that such devices can be calibrated as well in order to achieve colour fidelity.
Datacolor was the first manufacturer who made it possible to calibrate a Apple iPad. You require a colorimter like it is found in the Datacolor-Spyder-Products for screen calibration. As software you need the app named SpyderGallery which you can get for free at the Apple App-Store. The calibration happens with the aid of a computer which is connected with the Ipad e.g. via wireless lan. Once the calibration is done you get displayed the same correct and accurate colours as they are on a calibrated computer screen.
Conclusion
People who only use their computer for internet surfing and writing letters and emails do not need a standard monitor calibration because for these applications it does not matter if the colours are displayed 100% correctly. Also people who own a digital camera and want to watch their vacation images once in a while are comfortable with the available monitor adjustments.
But who wants to digitalize pictures with a film scanner or flat bed scanner or digital images which were made with a digital camera or people who want to edit their images with a image editing software should absolutely calibrate their monitor screens because the danger is too great destroying those images by working with uncalibrated output devices and resulting adjustment mistakes which in worst cases will not show until the images are printed.
Toolkits for first-time users at fair prices are available on the market, for example SpyderExpress. Such a purchase is quasi being made once a lifetime. For professionals there are are more expensive tools with numerous adjustment possibilities but those are recommended for users who have quite some spent time reading about this subject.
Current screen calibration products
There is a list of calibration products for several kinds of screens starting with easy toolsets for beginners who just want a fast and simple standard screen calibration up to professional tools for professional users who want to execute a high quality calibration with individual adjustment possibilites on several screens. We have tested the following tools which are in permanent use with us.
Datacolor Spyder5Express
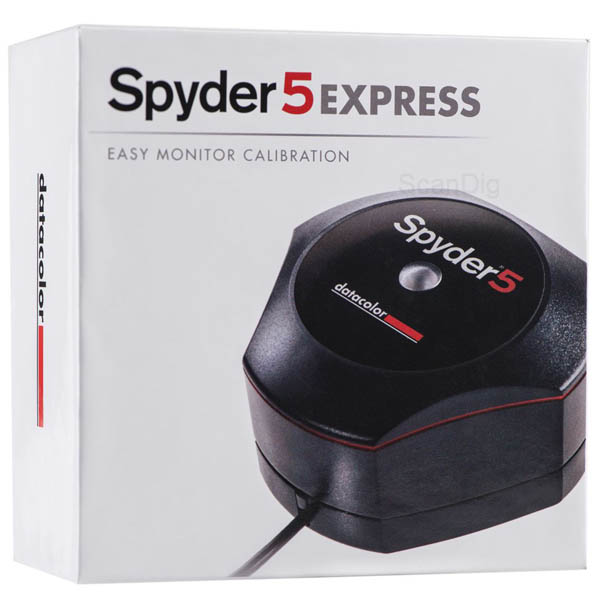
With the Spyder5Express the fourth generation of calibration solutions from DataColor is starting. In contrast to the third one a fair amount has changed: The sensor shines with a new coated filter which enables higher precision and more durability. In this matter the average precision was raised by 26% and the accordance with the spyder units has raised by 19%. Seven patented colour sensors make sure that monitors can display accurate colours. Meanwhile a multiplicity of wide-gamut monitors are supported. LCD-, OLED-, CRT-, DLP- as well as other display technologies are supported together with the possibility to calibrate iPads and iPhones besides laptops. A fast profile- and calibration check is available, too.
Because of the light gray designed sensor of the Express model it is easy do distinguish between the Pro- and the Elite-Version. The shape and size of the colorimeter has not been considerably changed.
With aid of Spyder5Express monitor calibration has never been easier. Certain knowledge is not required. After software installation you comply the instructions of the assistant who guides one through the whole calibration process. After that you can watch the difference of the monitor colours before and after calibration. At every computer start the new generated profile is loaded automatically in order to ensure a correct colour reproduction.
For the ambitious user who sets value on accurate colours on the screen without wanting to spent nights of reading subjects about colour management the tool Spyder5Express is perfect. Only about 5 minutes are needed for the first nearly full automatic calibration. The gamma value is set to 2.2 and the colour temperature to 6500K. ICC2-profile-support is granted additionally.
For those who want more than fixed values and want to take exert more influence on the calibration process including the possibility to involve ambient light can do precise adjustments with the SpyderPro- and SpyderElite-Model. The technical data of this product category can be found in our Online-Shop screen calibration. There all tools are available and can be ordered.
Datacolor Spyder5Pro
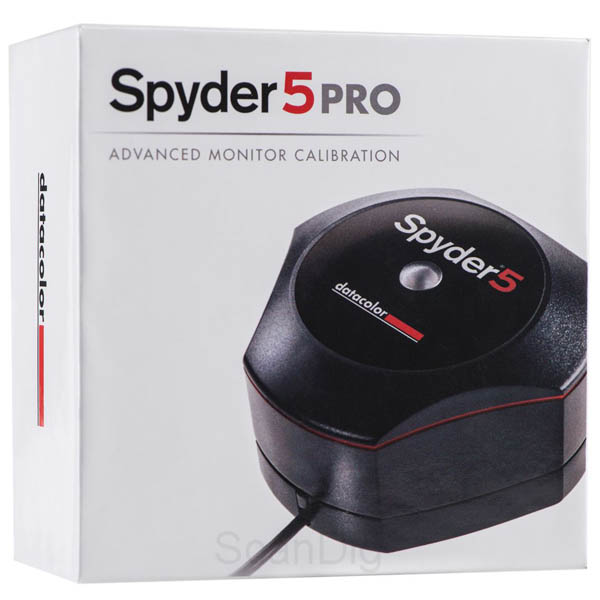
As usual in every new Spyder generation the Spyder5Pro hard- and software was improved. Because of a higher calibration quality the colours are displayed more exactly.
In contrast to the Express version the Spyder5Pro is also capable of involving the ambient light into the calibration process so that several profiles for several light situations can me generated. While connected to the computer the sensor can measure the ambient light and adjusts the screen brightness automatically during your work process. Therefore the sensor is set on top of a special carrier directly at your workplace. Also multiple to the computer connected monitors can be calibrated. In addition to this a calibrated screen can quickly be calibrated again with the "ReCal" function in order to compensate colour deviations. ICC4-profiles are supported as well.
Spyder5Pro is the standard tool for screen calibration with all necessary adjustments for beginners up to semiprofessional users. The cheaper tool Spyder5Express is a first-time user version without many adjustment possibilities while Spyder5Elite is the most professional version of Datacolor.
Photographers and designer will get their money's worth. A detailed description as well as a test report can be found at our website Test report Datacolor SpyderPro screen calibration.
Datacolor Spyder5Elite
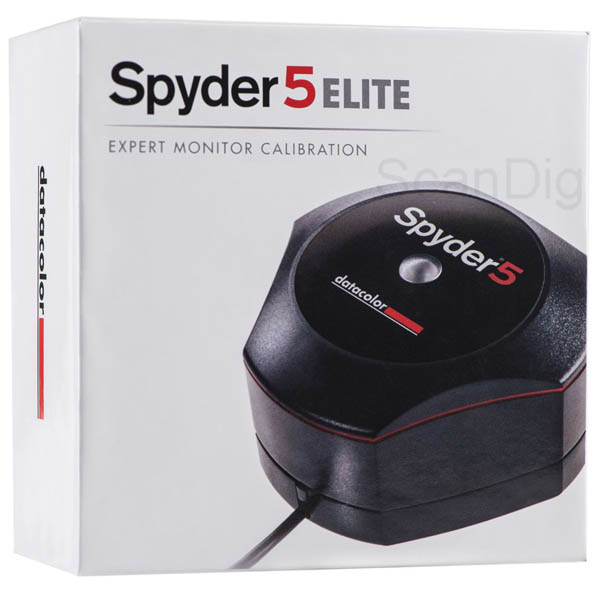
The new flagship of screen calibration is the Spyder5Elite from Datacolor. It directs to professional users for whom colour management is a daily routine. While in Spyder5Pro you can pick a selection out of a set of adjustments in Spyder5Elite you can make individual settings for colour temperature, gamma value, white luminance and black luminance. This product package offers professional users, image editors, videographs and cutters all possibilities to play out their needs. Furthermore with this colorimeter projectors can be calibrated, too.
Like the third generation the studio match assistant for adjusting studio devices on each other is also available. The graphical user interface offers through the expert console numerous individual settings for several parameters.
The Spyder5Elite is THE expert tool from Datacolor when it comes to the professional application for screen calibration. You can complement this with the completion of the whole colour management process by calibrating and profiling all the other in- and output devices such as a professional printer profiling with Datacolor Spyder5Studio.
Back to the index colour management
|
)
)
)